Showing posts with label Yummy. Show all posts

Friday, July 12, 2013

Good Food Friday: Dutch Oven Balsamic Vinegar Sirloin Tip Roast

I seriously think this was the best roast I ever made. Seriously.

It was amazing. The secret? The rub. Balsamic Vinegar and rosemary spice rub. Even my non-roast loving family members loved this roast. 

Finished roast

What you need:

  • 3.5 lb Grassfed Sirloin Tip Roast
  • 1 - 2 Onions (depending on size and taste preference)
  • 2 - 3 Carrots sliced
  • 3 - 5 Red Skin Potatoes cubed
  • Rub (mixed in a separate bowl)

For the rub:

  • 2 Tbsp organic extra virgin olive oil
  • 2 Tbsp balsamic vinegar
  • 1 tsp dried oregano
  • 1 tsp dried rosemary (mine is crushed)
  • 1 pinch of powdered thyme 
  • 1/2 tsp black pepper
  • 1/2 tsp sea salt
If I had had fresh spices for the rub I would have used them but my herb garden is in transition right now (read between the lines it was ripped out because of weed over growth). 

Instructions:
Heat oven to 250. 

On your stove top using your dutch oven heat oil (I used about 1 Tbsp of bacon grease and 1 Tbsp of Coconut oil) and sauteed the onions until clear and added the sliced carrots as the onions started to brown. 

While doing that I rubbed the spice & balsamic mixture all over the roast and let it sit. 

When veggies are getting soft and look like below remove from your pot and set aside. 

Add more oil if necessary to the pot (I added a little more coconut oil) and brown your meat on both sides. About 5 minutes or so each side. 

Remove meat when browned and add potatoes, the cooked veggies, then meat to the dutch oven. 

Cover with lid and place in oven. Cook for 60 minutes. Remove lid and cook for another 30 - 40 checking for desired done-ness (is that a word?). I personally think meat should be medium. 

Remove meat and let rest for 5 or more minutes and slice against the grain. Serve.

Cooked vegetables

Roast with rub

Browning meat

Vegetables added back to pot before roast went on top.
Amazing flavors and tender, not over cooked, grassfed healthy meat. What is your favorite way of cooking a roast?!

Recipe inspiration and rub recipe (they grilled theirs):
http://purelyprimal.com/2011/05/23/balsamic-sirloin-tip-roast/


Friday, January 11, 2013

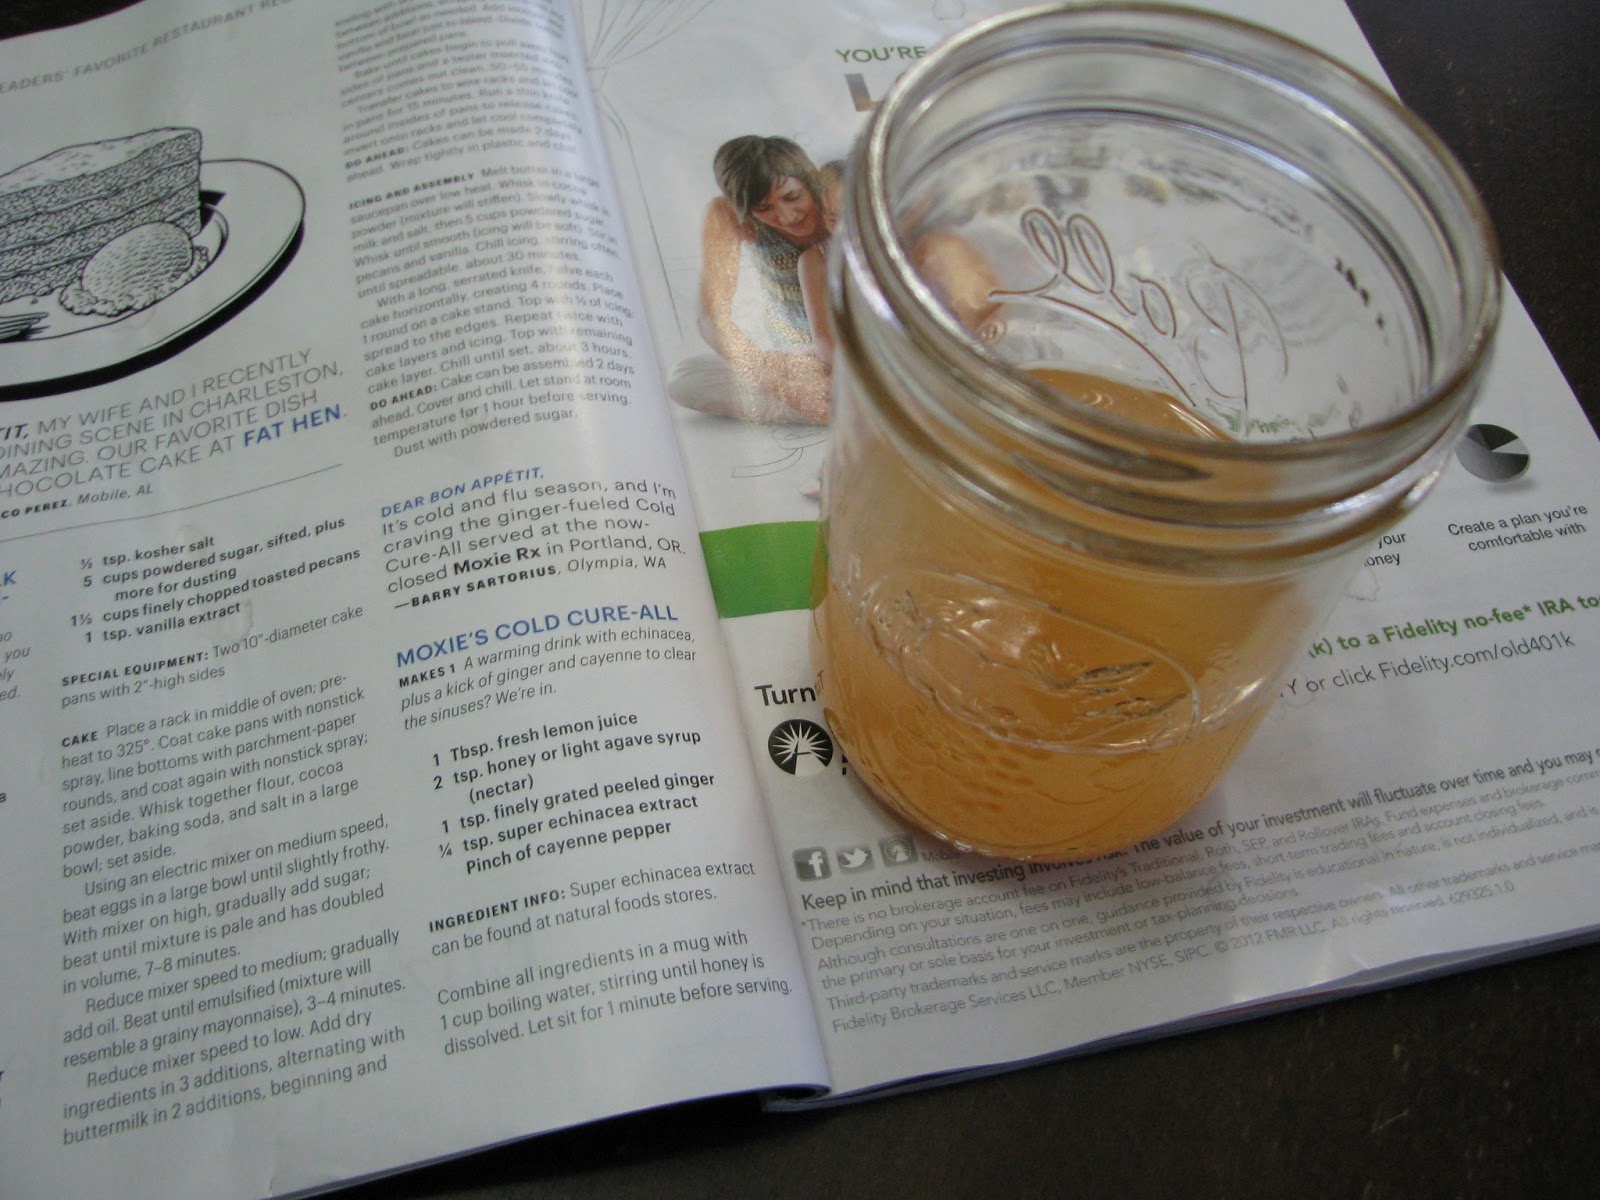
Good Food Friday: Immune Tonic

Well it is that time of year again I think it's safe to say we are all fighting something.  Being sick is no fun and sometimes staying healthy feels like a full time job.  Especially if you are trying to keep a whole house feeling fine.

I stumbled across this drink in one of my magazines and was immediately hooked by the ingredient list alone.  Lemons.  Ginger.  Echinacea.  I'm pretty sure this is the healthy vegan substitute for chicken broth!


Immune Tonic


Ingredients:

  • 1 Tbsp fresh lemon juice
  • 2 tsp. honey or light agave
  • 1 tsp finely grated peeled ginger (in the beginning I used powder)
  • 1/4 tsp echinacea extract (sometimes I skip this, it's still amazing)
  • couple drops of sriracha

Directions:
  • Measure and combine all ingredients into a mug (I double mine into a pint jar)
  • Add 1 cup boiling water stirring until sweetener is dissolved 
  • Let sit one minute before serving
inspired by bon appetit magazine (01/13)

I've been using this to replace my morning tea or afternoon snack.  If you are brave for an extra immune boost you could add some fresh peeled minced garlic.  

Wouldn't this make a great soup base?  Some sauted veggies and a spoonful of rice.  See what you can come up with...


Friday, August 31, 2012

Good Food Friday: Strawberry Milk Kefir Popsicles


Got milk kefir? I do (again) and I am trying to be purposeful in how I use it. No longer do I want my kefir to take up the refrigerator door but instead I am looking for creative uses for this yummy, good for you, beverage. We are enjoying a blast of super heated air the last couple days here in Ohio and the weather has brought cool treats to mind. Here is my recipe for strawberry milk kefir popsicles the perfect treat any time of day.

Ingredients:

  • 1 1/4 cup milk kefir
  • 3 Tbsp organic sugar 
  • 1 Tsp vanilla extract
  • 4 medium (frozen) strawberries & 1 large (frozen) strawberry
Directions:
In a blender combine all ingredients but large strawberry. Blend until smooth. Add large strawberry to blender and "chop" strawberry for frozen chunks of fruit in popsicles. Pour liquid into popsicle mold (I purchased mine for $5.00 at a thrift store). My mold can make 10 popsicles but the recipe only makes 5. This took all of no time at all. Perfect if you have little ones running around your feet. Freeze until frozen (yup I said it... did you see the "recipe for making ice cubes" the comments are too funny!).

Five popsicles is more than enough for my little family. There is a lot of room for creativity in this recipe. Sugar can be replaced with stevia or raw honey. Fresh strawberries can be used instead of frozen. I just have frozen for my breakfast smoothies (also milk kefir or homemade greek yogurt). 

For another version of strawberry kefir popsicles and a quick idea of just what kefir is visit here.

Do you drink kefir? How do you use your surplus? Feel free to leave a comment (they are always welcome!) or join the conversation on our Facebook page. 

Until next time!

Friday, April 27, 2012

Good Food Friday: Chocolate Apricot Bars

I love the idea of unprocessed food.  Real food.  Whole food.  Foods that heal.  That benefit my body.  I would say I eat this way about 80% of the time. The 20% of the time that I don't is normally for dessert.  But why?  Because healthy desserts have a nasty reputation for being boring, tasteless or just plain weird. As I have been reading more and more, learning about how individual ingredients function in a recipe it is getting so much easier to discover satisfying sweets that fit in the whole unprocessed category.  

Like this.  


Almost completely nuts and fruit this is just about the healthiest treat I can imagine.  And with the addition of dark chocolate chips, it tastes indulgent.  Almost like a granola bar I'm betting this will be great in the morning with a piece of fruit and mug of hot tea for breakfast!


Chocolate Apricot Bars (Gluten Free)

Ingredients:
  • 1 cup ground almonds (I did mine in a coffee grinder, but a food processor would work too)
  • 3/4 cup rice flour
  • 1 cup coarsely chopped walnuts
  • 1/2 cup chopped dried apricots 
  • 1/2 cup dried cranberries
  • 2 eggs, beaten
  • a few tablespoons water
  • pinch of salt
  • 1/2 dark chocolate chips


Directions:
  • Preheat oven to 350*.  Lightly grease an 8X8 baking dish.  
  • Combine dry ingredients besides chocolate.  
  • Add beaten eggs and mix with a fork until ingredients are no longer dry.  If the dough is not sticking together, add water a tablespoon at a time. 
  • Add chocolate chips.  
  • Lightly press dough into the pan.  Bake for 25 minute.  Allow to cool or if you can't wait, go ahead and sneak a square.  They hold up well (if you eat gluten free and avoid synthetic binders you know what I mean) and are quite filling.


Inspired by Elana's Pantry


P.S. I was right... they do make an excellent breakfast!


Friday, February 24, 2012

Good Food Friday: Roasted Romaine

 I don't think there is a vegetable that tastes anything less than incredible drizzled with olive oil and roasted in the oven.  Some totally explainable choices are beets, broccoli and tomatoes.  But lettuce?  Won't it just taste like warm salad?  Honestly the idea never crossed my mind.  But there it was in this months Bon Apetite, roasted next to Caesar chicken breasts.  It was gorgeous and I immediately took mental stock of my fridge and vow to make this vegetable.

Here is my lovely romaine.  Washed, dried well and cut in half lengthwise.  I drizzled them with olive oil cracked pepper and a bit of shaved parm cheese.  

Before a 450* oven for a very short 5 minutes (watch it!) ...


And after.  This picture makes me smile!  The romaine became slightly brown and was curling at the tips. And so very soft.    It becomes totally different than its raw crisp former self.  


Veggies are the main show of this supper and my goodness, I had seconds of everything! The romaine was warm and juicy.  It was a totally new way to serve a rather plain and predictable veggie.  You can bet I'll be craving this again... very soon!


Friday, January 13, 2012

Real Food Wisdom from 100 Years Ago: What We Knew Then & Should Know Now

Source

I enjoyed the post from Food Renegade today and thought it was worth sharing here at TBH. The book "Graded Lessons in Physiology and Hygiene" written by a physician, Dr. William Khron, and used as a textbook in Texas schools in 1908 can actually be found and read online!

I intend to read "Grade Lessons" for sure for myself but enjoyed the amazing & knowledgeable quotes from the book shared in Kristen's post. For example, Dr. Khron shares a list of adulterated foods and his quotes are surprisingly correct for a time less medically knowledgeable. The following quote is just a sample of what Dr. Khron thought about one of these adulterated foods:

“Butter is sometimes made entirely from … cotton-seed oil, to which coloring matter is added to make it look like pure, yellow butter made of rich cream. This product is called butterine, or oleomargarine. It can be sold for about half of what good butter would bring…. In the United States there is a law against the sale ofbutterine that is not stamped to show plainly to the person buying it that it is not genuine butter, but an imitation. Such laws are right in protecting the people against false or counterfeit foods, and in preventing people from being imposed upon” (page 39). 

I grew up eating margarine and remember when I was so stubbornly offended that my mom found out butter was better for us. I didn't want butter... I wanted the fake, tasty stuff. Thankfully I have since changed my mind. 

Check out one more quote from the book and then visit Kristen's awesome blog, Food Renegade, and read the book online for yourself.
“Sugar, syrup, and candy are sometimes made from corn by a peculiar process, by means of which the starch of the corn is changed into glucose, and a kind of sugar not so sweet or healthful as sugar made from sugar-cane or sugar beets. This sugar is quite apt to ferment, or sour, and decay within the bowels, thus causing disease. Some candies are colored with poisonous matter” (page 39).

Can you say yuck?!? Hopefully my day in yogurt making and fermentation experiments pays off. I hope to undo some of the harm of those adulterated foods. 

Homemade Greek Style Yogurt (version 2)

I recently realized while going through the motions in my kitchen, making Greek style yogurt, that I have been keeping a secret from you.  That the way I make my yogurt has changed.  I had found new shortcuts and before I had time to tell you it became habit.  So yesterday while I was catching up in the kitchen, baking breads and cooking beans, I took a few photos of my latest gourmet shortcut to share.


Into three glass quart jars (you could use clean applesauce jars or even pickle jars) spoon two tablespoons of store bought yogurt into each jar.   Let the yogurt come to room temperature.


In a large stainless steel pot, allow three quarts of milk to come to room temperature.  Then heat the milk slightly until when test it with a finger, you can't feel it, hot or cold.  Body temperature, I guess.


Pour the warm milk into the jars.  Put a lid on each.  (The red funnel is part of a canning kit and makes filling almost any jar so easy.)


Find a helper and shake each jar to distribute the yogurt into the milk. 


Fill a cooler with bath temperature water.  Cram the jars into the cooler and shut the lid.


Set the cooler in a nice warm spot (mine is always on top of the freezer - this is also where I set bread to rise) and let it sit undisturbed for 24 hours.  I have found that letting the yogurt sit for longer makes a thicker yogurt.  Over Christmas when things were a bit hectic here, I accidentally left it for 48hrs.  It looked like curddled milk but after I strained it, it looked fine.  A tad bitter but fine.


Line a bowl with a clean pillowcase.  Pour the yogurt into the pillowcase.


Tie it up and let it drip until the volume is reduced by half.  Since I made three quarts of yogurt, I let it strain until I have collected a quart and a half.  This will leave you with one and a half creamy quarts of fresh yummy yogurt. Since it is almost identical in consistency to sour cream, it can be used cup for cup in traditional recipes. My husband and oldest son eat this stuff by the bucket, the bucket, I swear.  You should see their idea of a serving size.  I figure I'm saving some serious cash making the stuff myself.  We make ours plain and unsweetened but for a serving you can sweeten it up with a tablespoon of some homemade jam for a real treat.  


----------------------------------------------------------

P.S.  

In the kitchen I was fooling around with a new gluten free bread recipe.  Sandwich bread, breakfast bread.  No artificial binders or fillers.  So healthy, made with almond flour.  While almond flour is getting plenty of talk (and for good reason!) it is a bit expensive.  I ground my own in the Vitamix and after mixing was pleasantly surprised to pull this out of the oven....


Super rich and healthy... very substantial.  A bit much for the little ones but an awesome grain free bread for a grown-up breakfast.  Highly recommended!  

almond flour bread recipe from making love in the kitchen - meghan telpner

Wednesday, January 11, 2012

Nourishing Our Children: 20 Minute Free Video on Traditional Diets


The first 20 minutes of the Nourishing Our Children video. The full presentation materials (DVD, e-book and study guide) can be obtained with a donation of $55 to the Nourishing Our Children campaign through January 18th. 

My thoughts on the first 20 minutes:
Nourishing Our Children is based on answering the question, "Can we be well fed but malnourished"? The video covers how Weston Price (a Cleveland dentist) set out to answer that question as he began noticing the increasing deformities in the mouths of children here in Cleveland, Ohio. Within the last year my eyes have been open to traditional foods. Fermentation (needed desperately in my diet to combat my infestation of candida), raw milk, animal fat (keeping the fat in our food and diet), eating non-industrial (man made) food, proper food preparation (soaking of grains, sour dough preparation, fermentation, etc.), etc.

Starting with reading "Real Food: What to Eat and Why" by Nina Planck my eyes were startlingly opened to the idea alone that fat is extremely good for us and essential in our diet. The right kind of fat, used correctly, do not make us fat! Amazing. I know. We are so focused on "low-fat diets". That is hardly our biggest health concern.

I have continued to endeavor to change my diet and Wade's from the industrial diet we are so very used to. Because of finances, busy life, and learning it is a slow and gradual process but I am encouraged by the knowledge that I now know how to well nourish myself and my children (and husband God willing!).

There is one more point I want to address. While I embrace and appreciate the idea of traditional diets and believe there is clearly something nutritiously right about them. I am cautious to embrace the idea of evolution being the driving force behind our need for traditional diets. I look at the concept of traditional foods and diets in light of what the Bible teaches us about our history and from our history our diet. What God made was perfect, what man makes is flawed. Everything with a grain of salt and seeking the truth through God's eyes.

What are your thoughts? Is this idea of traditional foods completely new and foreign to you or is this something you are already changing about your life style? I would truly love to know.

Keep your eyes open. Jackie was busy in her kitchen this morning. She may have something fun to share! You know... she is my inspiration for looking at holistic and natural health. She discovered it first and has paved the way and inspired me for years. 

Friday, January 6, 2012

Good Food Friday: The Ups and Downs of Gluten Free

No actual recipe today friends.  Just a story about food... 


I love a challenge, in the kitchen that is.  There is such a feeling of accomplishment when I can convert a conventional recipe to a healthier version.  It started with changing simple ingredients like sour cream to homemade yogurt or butter for applesauce.  Then I ventured into adding some extra things like nuts or seeds.  I was feeling good, making things from scratch with almost 100% success, cutting out all the fillers and extra processed components of recipes.

About 4 years ago our family physician suggested we try our second son on a gluten free diet.   My first thought was I am totally up for this; he will miss out on nothing.  I read and studied and experimented and tested, learning the properties of the various flours and the ratio of butter to eggs.  I was really proud of my accomplishments.  I even found a decent recipe for bread.  (The store bought stuff while gluten free had a TON of extra processed garbage in them!)  So basically the entire family went gluten free.  It was not a difficult decision to make, it was simply easier than making two different meals. Minus the bread.  There will always be two kinds of bread in my fridge, both homemade, one spelt the other gluten free.

A year ago, in another challenging attempt to save a few bucks, I bought a pasta machine.  Not one of those you can see in the late night infomercials that blend and extrude but the shiny old fashioned metal kind with the clamp and the crank.  Oh it is beautiful.  Once a week, usually Thursdays, I bring the machine down from the top shelf in the pantry, pour myself a glass of red wine (what is a good pasta dinner without one!) and crank out the good stuff.


Honestly, it's  okay.  This is the one thing that is killing me about gluten free.  I have done so much reading and testing that I feel by now I should have struck gold, but I'm still not happy.  So much of pasta making is in the ingredients.  I have used only farm eggs and fresh ground rice flour.  But the one thing I absolutely do not want in my pasta are the very ingredients that determine its success... fillers.   Starches.  Empty calories.  Corn based binders.  Really?  I have come all the way to run into this.

Yesterday all I could think about was making ravioli.  At two, I assembled the fillings.  At three I had finished researching a new pasta recipe.  By four, I was making a second batch of dough, with my standard and somewhat disappointing recipe.  Big sigh.  Huge sigh.  Here is what the four hour project/finished ravioli looked like...


and you can see by my kids plates they had no complaints.


Neither did my husband...

But by my fourth square, I was done.  It did not taste like I wanted it to.  Like I dreamed about all afternoon.  Like I remember before going gluten free.

So why?  Why keep on trying?  Keep falling short...

Because the chance of success, a total complete success, is just so close. This entire post may see kind of negative but I promise you I never see it that way.  In my experience, all of the best things I have achieved were difficult.   Having kids young.  Getting through school.  Learning to cook and bake.  Being involved.  Having more kids.  Building a home.  Making time to be me.  Having one more kid.   Soon I will have this under my belt too.   I have learned so much.  I'm sure I take most of it for granted now, I know the kids do, in a good way.  They know that I can make anything and never doubt my experiments.  So I'll keep going and failing and succeeding because in the end I believe it is the journey that counts.

How about you? C'mon, share your success/failure stories...

------------------------------------------------------------------------------------------------------------------

Gluten Free Inspiration -- some sites I visit often for all their yummy recipes and super ideas!

Gluten Free Recipes - Elana's Pantry
Elena's Pantry :  A very clean and simple site with awesomely nutritious foods

Making Love in the Kitchen :  Meghan is an inspiration!  All her foods are insanely creative and yummy!


Know of any others???  Share the love... We gluten free people need to stick together!

------------------------------------------------------------------------------------------------------------------

Also, don't forget to let us know you are out there and reading!


Friday, December 16, 2011

Good Food Friday: Venison Stroganoff

Venison Stroganoff

We eat primarily venison, chicken, and pork. Soon we will eat primarily venison, chicken, and rabbit (all of which we can raise or hunt ourselves). If you are a reader of Nourished Kitchen, the Weston A. Price Foundation, or an advocate of traditional or real foods, you will know that on the list of Good, Better, Best: Traditional Foods for Every Budget has wild game under the best red meats you can eat. I have cooked for the last three years, substituting venison for beef. The only exception to that rule is that I like an occasional pot roast and my husband likes to get more ground from his deer. I cave to the buy one get one free sales for beef roasts about twice a year.

Here is a quick and easy recipe for venison (you can of course use beef) that is a family favorite. Don't know how to get venison if you don't hunt? Ask around! You maybe surprised at how many hunters you know who are willing to give you a venison steak or two to experiment with. You maybe hooked ever after. You can of course buy venison (which is farmed in the state of Ohio... you can't buy wild venison) or see if you can barter with someone for some venison meat. We barter hunting rights on a small two acre suburban lot in a township near by for deer meat.

Ingredients:
1 lb. venison steak, about 1/2" thick
2 Tbsp. butter
1 lb. mushrooms, sliced
1 medium onion (minced about a 1/2 cup)
1 can (10 1/2 oz.) condensed beef broth
2 Tbsp. ketchup
1 clove garlic, minced
1 tsp. salt
3 Tbsp. flour
1 cup sour cream
3 to 4 cups hot cooked noodles (I use egg noodles for this meal)

Directions:
Cut meat into bite size pieces. Melt butter in large pan or skillet (I use cast iron). Add mushrooms and onions and cook until onion is tender, then remove them from the pan. In same pan, cook meat until light brown (for venison I still leave a tiny bit of pink because I don't want to over cook the meat). Reserve 1/3 cup of the broth, stir in remaining broth, ketchup, garlic, and salt. Cover and simmer 15 minutes.

Blend reserved broth with flour, stir into pan. Add mushrooms and onions back into pan. Heat to boiling, stirring constantly. Boil and stir 1 minute. Reduce heat to low. Stir in sour cream and gently heat (don't boil). Serve over noodles.

Tops this meal takes about 30 minutes. There is rarely enough left for one person to have left overs in a family of four. Enjoy!

Friday, September 9, 2011

Good Food Friday : Tuna Cabonara

This is my absolute favorite fast supper.  I honestly can not believe I haven't shared this with you!  It comes together super quick with staples I'm sure you already have in your kitchen and even being a pasta dish I packs in a ton of protein.  My only complaint is that this dish can be awfully "beige" and colorless so please do your eyes a favor and add the veggies!


My usual recipe for this makes enough for our seven but the ingredients are totally flexible.  You really can't go wrong.

Tuna Cabonara

Ingredients:

  • pasta
  • tuna
  • onions
  • red bell pepper (optional, in fact most times I don't have this but its great for color)
  • fresh parsley (again optional but great for presentation)
  • Parmesan cheese (fresh grated) 
  • eggs, beaten
  • salt
  • oil or butter
Directions:
  • Boil pasta in salted water until al dente. 
  • While pasta is boiling, saute onion and peppers in oil or butter.  When veggies are softened, added canned strained tuna.  Cook until warm throughout.
  • Have cheese grated and eggs beaten
  • Drain pasta, but do not rinse.    Toss pasta into the tuna mixture and quickly toss with eggs and cheese.  The residual heat from the pasta will cook the eggs and melt the cheese.  
  • Sprinkle with a pinch of salt and stir in parsley.  Serve immediately. 
I usually let the number of cans of tuna dictate the beaten eggs.  In our house, it is three cans of tuna to three eggs.  See, plenty of protein.  This recipe always makes it.  No matter what I have on hand I can pull this one off.  No peppers?  How about peas?  No spaghetti?  Substitute rice.  Just don't skip the cheese or eggs.   The combine and become the creamy sauce.


Friday, September 2, 2011

Good Food Friday : Gluten Free Banana Bread

The reason you should make this banana bread...


Because there are more bananas in it than any other ingredient.

And no oil. 

Actually no added fat.

A nice surprise for the little ones up early for school.  Make the batter the night before and pop it in the oven first thing in the morning.  The kids may not even need you to drag them out of bed.  


Ingredients:
  • 4 brown bananas, smashed
  • 2 eggs
  • 3/4 cup sugar
  • 1/2 cup applesauce
  • 1 2/3 cup rice flour
  • 1/3 cup tapioca flour
  • 1/4 tsp salt
  • 1 tsp baking powder
  • cinnamon
  • pinch of nutmeg
  • (chocolate chips or nuts - optional)
Directions:
  • Mix everything in a bowl.
  • Pour into greased and floured mini baking pans (3 of them)
  • Bake at 350* until medium brown on top and a toothpick inserted comes out clean (So sorry I don't even have a time estimate.  My usual batch is quadruple this and I didn't time this batch, surprise, just put it in while packing lunches.)

Also makes an excellent after school snack or tea time, or before bed... not that I would know, or that I actually ate the bread that many times today.  I've said too much.  Enjoy!


Friday, August 19, 2011

Good Food Friday : Asian Style (Super Quick) Green Beans

Incredible how many beans a 30 ft row of plants can produce isn't it. And this was just one picking!


So far I have frozen 25 quarts, fermented a gallon and given away countless grocery bags, not to mention the ones that have been served at our supper table or brought to picnics. We sure do enjoy the foods of the season but boiled beans can get old real quick especially when cooking for a bunch of kids who can remember everything they have put in their bellies for the past week. So I found this recipe (and others, but this is my favorite). I always loved the green beans at any Asian buffet but it never occurred to me to try and make them at home. The ingredients could not be simpler and the results could not be more delicious. And my favorite? The beans still have a nice crunch!


Ingredients:
  • 6 cups fresh green beans, ends trimmed
  • Braggs Liquid aminos (you could use soy sauce or tamari)
  • sugar
  • olive oil
  • minced garlic

Directions:
  • In a large lidded frying pan saute garlic (3 cloves) in oil until very lightly brown.
  • Add green beans and saute until they start to brown, about 5 minutes.
  • Swirl some Braggs liquid aminos (I did three circles around the pan) on the green beans then sprinkle about 2 teaspoons of sugar. Stir and cover. Reduce heat to low. A glaze will form on the bottom of the pan so return to the stove every couple minutes to stir. Since the pan is covered the beans will steam themselves.
  • After ten minutes the beans will be cooked but still snappy. Stir the glaze and green beans one more time. If at any time the beans start to burn, add 1/4 cup water to deglaze the pan and save supper!
  • Serve immediately, or in a bit or cold. Good anytime. For that extra Asian kick, sprinkle with toasted sesame seeds.

Friday, August 12, 2011

Good Food Friday: Perfect Kale Chips

Heard of them? Maybe... Tried them? You should! I love kale unconditionally but kale chips? How could I not at least try. So while the recipe is nothing new or original (basically just olive oil, salt and your favorite kale) I just wanted to let you know that indeed the recipe deserves the attention it is getting. Easily successful if you have a watchful eye. Here is how it goes...

Sigh... kale at sunset. Beautiful, huh?

Gather a bunch of kale. Like tons. This stuff cooks down so if you want enough to serve more than yourself and another lucky soul get two grocery store bunches. If you are growing it in your backyard, get about twenty stems.

Rip the leafy parts off the hard stems. Big pieces, about the size of my palm worked for me. Toss them in a large bowl to accumulate.


Drizzle with olive oil. Start with a little and use a rubber spatula to scrape and toss the kale with the oil. The goal here is to get all the kale lightly glistening with oil and not so much that they are greasy. I know, it's a fine line, you will find what works. Sprinkle with a bit of salt. (Some recipes here get fun and add garlic or cheese or spices. I've tried cheese and was mildly disappointed so I'm just going to keep it simple.)

Distribute kale evenly on many baking sheets. This batch of mine took four. Yes four. Seems like a lot but by the time it was said and done I ended up with a medium sized mixing bowl of kale chips.


Place kale in a preheated 250* oven. After 15 minutes pull them out and check them. Chip by chip and leaf by leaf. Pull off the ones that are already firm and crispy or just about there (they will hold their shape when picked up basically). Then there will be some that are still very soft and flexible. These require a couple more minutes in the oven. Condense the kale on your baking sheets (by this time I was down to two) and stick them back in the oven for 5 more minutes.

So there you have it. Very specific directions of how to succeed. I think the greatest improvement of this version and most others is the lower oven temperature. Much less risk of the super crumbly over cooked kale chips. And don't worry about if some do get too crispy. Save them to crumble and sprinkle on soups or salads. Nothing goes to waste.

(Insert picture of gorgeous kale chips being gobbled by curious guests...)

Sorry no finished product picture. It's becoming an unfortunate habit of mine. Taking too many before and during photos and having no proof of end results. But trust me, they look like every other kale chip photo out there. Just fewer burnt ones... and I'd be willing to bet that this recipe alone could convert you to become one of the unconditional lovers of all thing kale!

Saturday, May 21, 2011

Good Food Friday: On Saturday: Soulvaki (Shish Kabobs)


In general this can be made any way you like it, however this is my recipe that is quickly moving to a family summer favorite. Here is what you need:
  • 2lb. pork roast
  • Assorted veggies (Eggplant, peppers, red or white onion, mushrooms, etc.)
  • 3 tbsp olive oil
  • 1/2 tsp pepper
  • 1 1/2 tsp salt
  • 1 1/2 tsp garlic salt
  • 1/2 tbsp garlic powder
  • 1/2 cup lemon juice
  • Dried oregano for seasoning skewers on grill
Cute your pork into bite sized cubes. Mix all ingredients (except veggies) to create a marinade. Marinate pork cubes at least 30 minutes or overnight if you plan ahead. Use marinate for basting as well. While pork is marinating I then cut up the veggies (use what ever your family enjoys) into bite sized pieces. I start with the eggplant because I like to soak my eggplant (at least 30 minutes) in salt water to remove some bitterness.
Eggplant and pork marinating.

Bite sized veggies.

I snip the skewers in half to make grilling easier for me and to create an illusion of "less is more". No more than two pieces of meat go on a skewer then and my guys eat more veggies!
My mini skewers waiting to go on the grill.

Grilling. I cover them with a large cookie sheet.
Grill over medium-high heat for about 5 to 10 minutes. Serve as soon as possible! Enjoy.

Friday, May 6, 2011

Good Food Friday: Tacos!

I really wanted to post about my newest favorite soup...


... but I'm sure you are getting tired of all my recipes needing a bowl and spoon. So I'm doing my next favorite super quick supper: tacos! I can feed my entire family (husband with bottomless stomach, 3 boys with a hollow leg, 2 itty bitty girls and myself) on one pound of ground meat. Seriously! Want to know my secret? Beans. They are amazing are they not? Inexpensive but when combined with meat and spices, well, it is darn close to magic what they can accomplish. And instead of prepackaged taco seasoning, I throw together my own, thank you very much. The funny thing is, this is also my recipe for chili, just add onions, fresh peppers and a couple cans of chopped tomatoes and let it sit in a crock pot for an afternoon.

Meat and Bean Tacos

Ingredients:
  • 1 lb ground meat ( I use turkey or beef)
  • 4 cups of great northern beans, soaked overnight and cooked for two hours (or canned)
  • 1 tbsp cumin
  • 1/2 tsp salt
  • 1 tsp paprika (or chili powder)
  • 2 huge cloves garlic
  • a couple of pinches of red pepper flakes
Directions:
  • Saute meat until no longer pink. Add beans.
  • Combine spices in a bowl and add a bit of water and stir.
spices without water

spices with water
  • Add spices to meat and bean mixture. Serve when heated through. Serve with brown rice, spinach, salsa, sour cream, cheese, shredded carrots... really any vegetable!
Yesterday's supper? Burrito bowl!


Okay, on second thought, that does require a bowl and spoon. So since I already broke my own rule for this post I might as well give you the recipe for my new favorite soup, too. Coincidently, this is what I had for lunch yesterday. Oh so good!

Chinese Lettuce Soup

Ingredients:
  • 1 tbsp olive oil
  • 3 mushrooms (very thinly sliced)
  • 1 carrot (very thinly sliced)
  • 1 handful spinach (don't you love my precise measurements?)
  • bunch of chives (or scallions)
  • Bragg Liquid Aminos or soy sauce

the chives are from my garden

Directions:
  • In a wok, heat oil over medium heat. Add mushrooms, carrot, and chives. Cook, stirring constantly until mushroom are slightly brown and carrots begin to soften, about 3-4 minutes. Add 3-4 cups of water. Add Braggs Liquid Aminos, about 3 turns around the wok, or to taste. Simmer until heated through. Sometimes I add a few drops of sesame seed oil for that truly authentic Asian flavor. You can also serve it with cubed tofu or chicken.
I enjoyed it with a few shrimp. Such a treat!


.......................................................................

Besides all the cooking taking place in my kitchen, there is TONS happening outside of my kitchen window. Can't wait to share some finished projects with you.


See you next week with photos of the amazing progress taking place in the backyard, despite the soggy ground and gray skies. It looks like spring is coming after all!


-----------------------------------------------------------------------------------------------------

Joining up again with all our lovely neighbors over at Farm Friend and Farm Girl Friday. Welcome back to all our friends and perhaps new visitors! If you like us and have a Facebook account won't you take a moment to "Like us" on Facebook? On our Two Blue Houses Facebook page we often share pictures and other things we don't post on the blog. You can also follow us via Newtworked Blogs and get just the quick up to the minute post updates.  Not into all that crazy social networking? If you scroll to the bottom of our blog you can submit your email address for daily or weekly blog updates. This week we also had a cultured (fermented) vegetable recipe. Look around we are so glad you stopped by!

-----------------------------------------------------------------------------------------------------

You have to check out this amazing T-shirt by Jackie. She updated a simple black T-shirt in the simplest way, but it is so beautiful. It is so adorable; I think I am in love! - Lauren
Related Posts Plugin for WordPress, Blogger...