Showing posts with label recipe. Show all posts

Friday, February 21, 2014

Good Food Friday: Grain Free Bread (Almond and Coconut Flour Bread)

I know, the name says it all.

Grain-free bread?

Doesn't even the most basic definition of bread involve, well, grain?

Yes.  And all of my homemade bread recipes involve all kinds of combinations of grains.  Rice. Quinoa. Oat...


But not this one.  I have been experimenting with almond flour for years.  Years.  And most of my recipes have been, honestly, barely edible by my definition (but not by the rest of the household, thankfully!).  This one was a success on its first attempt and verified in the weeks since.  I don't really follow all the eating styles and labels on foods theses days so I don't know who can enjoy this but it sure is a treat around here.  A nice slice with a bit of coconut oil has been my comfort food lately!


Grain Free Bread (Almond Coconut Flour Bread)


Ingredients:

  • 1 1/2 cups blanched almond flour
  • 1/2 cup coconut flour
  • 1/4 cup ground flax seeds
  • 3/4 tsp baking soda
  • 1/2 tsp salt
  • 1 Tbsp xylitol (you can use honey or sugar as well)
  • juice of 1/2 a lemon
  • 4 eggs
  • 1/2 to 3/4 cup water
Directions:
  • Preheat the oven to 350* F and grease a *slightly smaller glass loaf pan* with coconut oil. 
  • Combine dry ingredients and mix well.  Add lemon and eggs and mix well.  Start with the 1/2 cup water and mix until the dough resembles a stiff cake batter.  
  • Scoop batter into the loaf pan and smooth with wet finger or a wet spatula.  Don't worry, it will rise and fill more of the pan, I promise.   Bake for 35 minutes.  
  • Allow to cool.  Slice in pan.  Keep covered when stored.
This bread blew me away in the fact that unlike so many of the gluten free breads it continued to stay moist until the very last slice, about a week!  If you know gluten free bread, that is a miracle!  


Also, this is not a sweet bread.  If you like your stuff more on the sweet side, double the sweetener, or top with raw organic honey and a sprinkle of cinnamon (my preference)!
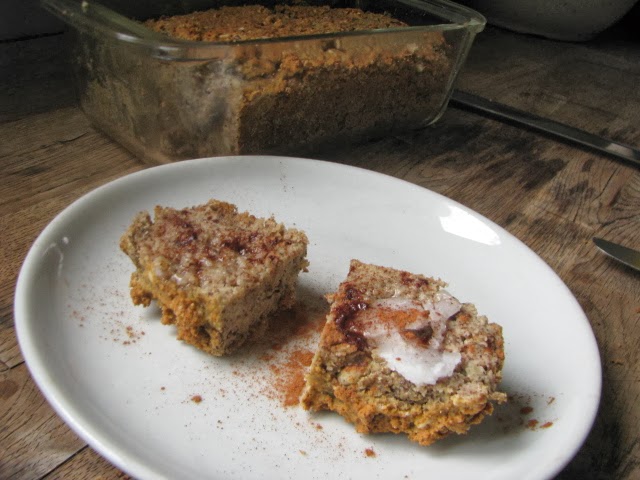


** Here is what I mean about the slightly smaller loaf pan.  Although both pans say 1.5 quart, this loaf was
baked in pan on the left.  It looks slightly more narrow than the one on the right.  Am I crazy?  By about an inch.   I bake all my gluten free loaves in this smaller pan because they tend to get a better rise.


Friday, February 14, 2014

Vegan Gluten Free Kani Salad

Remember Good Food Friday?

Well I am happy to say we have still been eating plenty of good food just not posting our recipes.  This has to change.  Not only so we can share our inventive eats but so we can have a record of them too.  Oh how many times I have searched my own blog for my own recipe!

This one is new to me.  Kani salad.  Ever heard of it?  Introduced to me this past weekend by some food adventurous friends.  It's basically cucumber and crab with spicy mayo. But it is never real crab at these places.  No.  That fake stuff. Made with random pulverized fish, weird food starches, poor quality vegetable oils and probably MSG? Definitely not on the gluten free or real food list.  So here is a cleaned up version.


(Excuse the terrible phone photo.  Next time I promise to snap a shot with my real camera
 before I devour.  But trust me, it's beautiful...)

Spicy Kani Salad


Ingredients:
  • cucumber, julienne (I use this handy tool)
  • vermicelli rice noodles, cooked and cooled  (I tend to keep this on hand soaking in the fridge.)
  • vegan mayo - I used Vegenaise (or my Creamy Garlic Tofu Dressing, to follow)
  • sriracha
  • brown rice vinegar
  • sesame seeds
Directions:
  • Toss cucumber and noodles. I tend to always use more veggies than noodles.
  • Top with a dollop of mayo, a squirt of sriracha and a splash of vinegar and a sprinkle of sesame seeds. Toss to coat evenly.   Adjust to taste!
I think the noddles basically nail the texture of fake crab, if fake crab could be considered desirable, if only for texture. This is pretty basic but I think it would be fun to add shredded carrot for more color, or tuna for protein, all on a bed of lettuce for a meal.  Some versions add mango for a slightly sweet yet spicy side dish.


And it always tastes better when eaten with chopsticks!

******************************************************

Creamy Tofu Garlic Dressing


Ingredients:
  • 8 oz organic tofu
  • 2 Tbsp cider vinegar
  • 1 Tbsp lemon juice
  • 1 Tbsp Braggs liquid aminos
  • 1 squirt mustard
  • 1 clove garlic
  • 1/4 cup organic olive oil 
  • 1/3 cup water
Directions:
  • Blend first 7 ingredients in a blender.  I used my Vitamix but I'm sure this would work in any decent blender. With blender running, slowly add oil in a thin stream.  Then add water the same way until you reach desired consistency.  It will look questionable a few times but it will come together in a beautiful creamy sort of way.
Use this as a dip base or as a mayo replacement.


Friday, January 11, 2013

Good Food Friday: Immune Tonic

Well it is that time of year again I think it's safe to say we are all fighting something.  Being sick is no fun and sometimes staying healthy feels like a full time job.  Especially if you are trying to keep a whole house feeling fine.

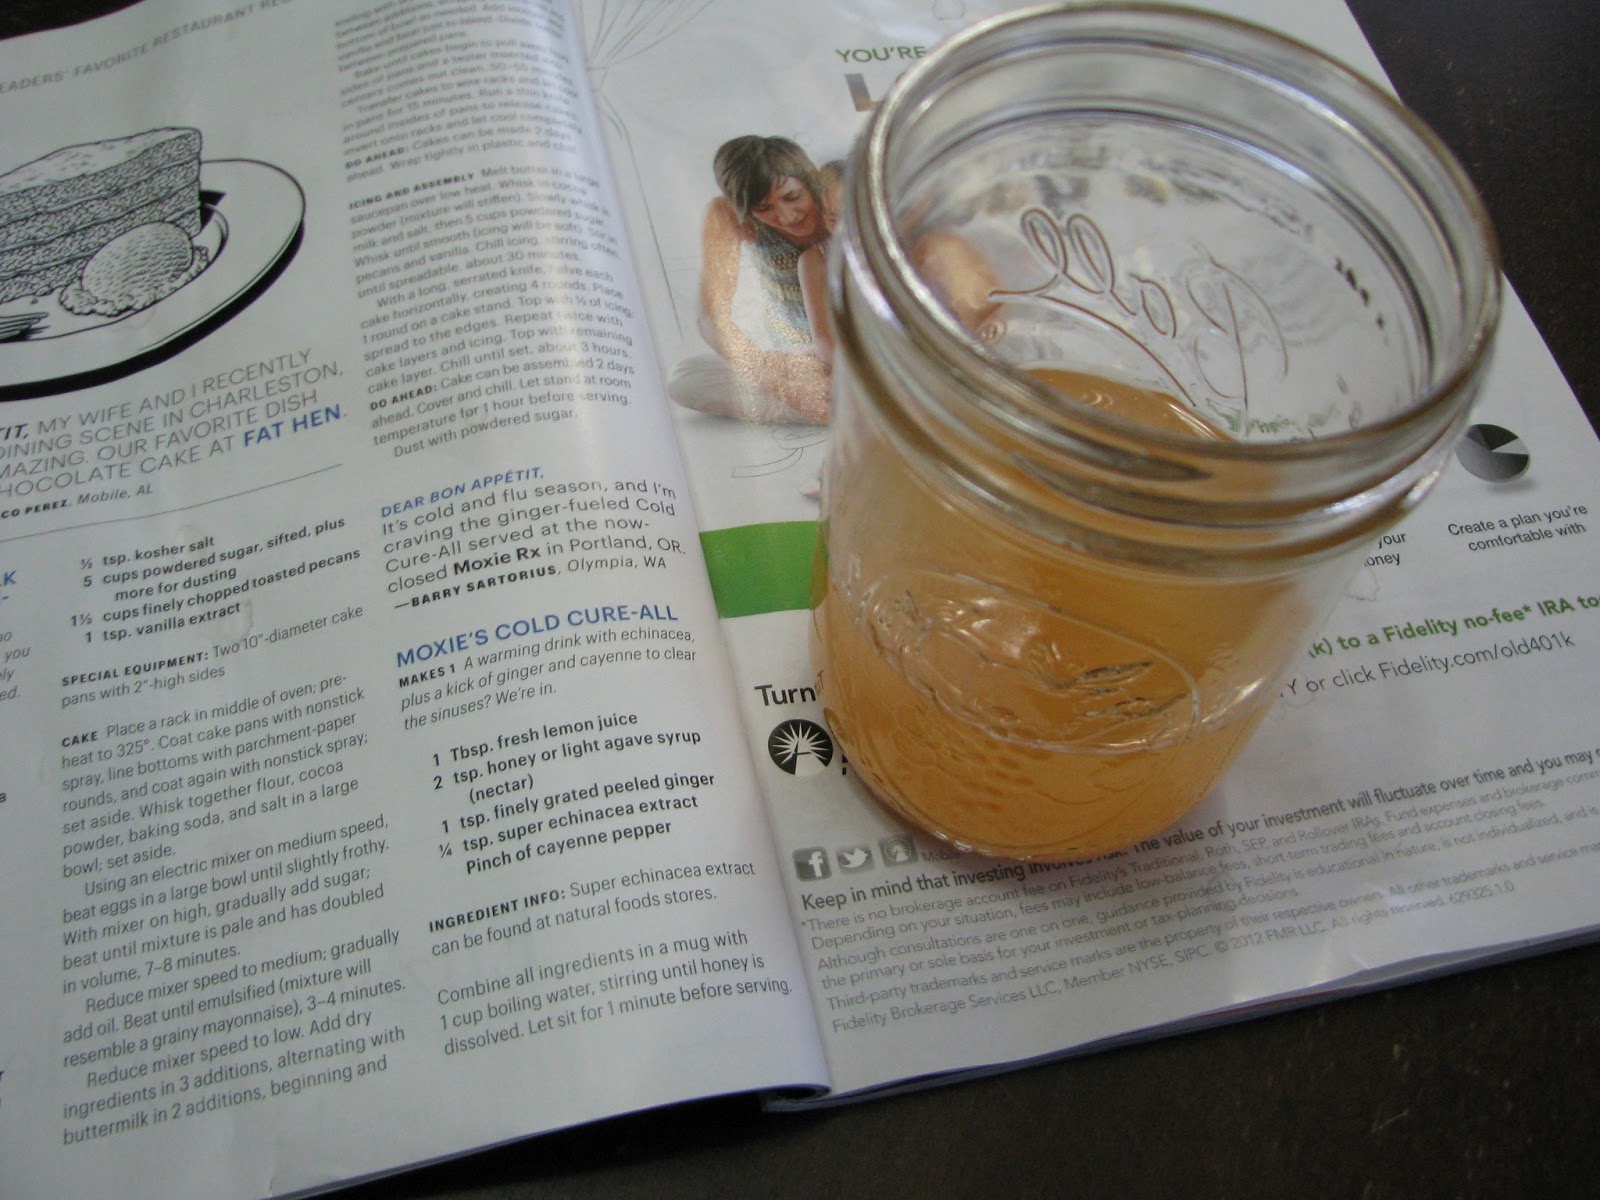
I stumbled across this drink in one of my magazines and was immediately hooked by the ingredient list alone.  Lemons.  Ginger.  Echinacea.  I'm pretty sure this is the healthy vegan substitute for chicken broth!


Immune Tonic


Ingredients:

  • 1 Tbsp fresh lemon juice
  • 2 tsp. honey or light agave
  • 1 tsp finely grated peeled ginger (in the beginning I used powder)
  • 1/4 tsp echinacea extract (sometimes I skip this, it's still amazing)
  • couple drops of sriracha

Directions:
  • Measure and combine all ingredients into a mug (I double mine into a pint jar)
  • Add 1 cup boiling water stirring until sweetener is dissolved 
  • Let sit one minute before serving
inspired by bon appetit magazine (01/13)

I've been using this to replace my morning tea or afternoon snack.  If you are brave for an extra immune boost you could add some fresh peeled minced garlic.  

Wouldn't this make a great soup base?  Some sauted veggies and a spoonful of rice.  See what you can come up with...


Friday, October 5, 2012

Corn Free Dairy Free Vegan Caramel

There is something about fall that makes certain foods more appealing. You know what I'm talking about... all things apple and/or caramel.  But you throw in a food allergy like dairy or corn and literally half of the most tempting fall deserts are eliminated.  Caramel is by definition butter, sugar and milk.  When planning my daughter's early fall birthday party this year I was determined to figure this one out: a dairy free and corn (syrup) free caramel for caramel chocolate covered apples.

I started with this basic recipe.  The proportions seemed right and I would only need to attempt one major substitution.  When you are playing with specialty ingredients, it can get expensive so you want to do most of the guessing before you actually start.

Please read through instructions a couple times before attempting.  I promise after you make it once, it will all make perfect sense the next time!

Ingredients:
  • 2 cups organic sugar
  • 2 cups almond milk
  • 1 cup agave 
  • 1 cup earth balance or your normal butter substitute
Equipment required:
  • large pot, at least 6 quart
  • candy thermometer
Instructions:

Place all ingredients in you pot and clip your candy thermometer onto the side.  Warm over low to medium heat.  I hovered around a three or four.  Stir, stir, stir.  The liquid will boil at 212*F and stay at that temperature until the water has evaporated.  Eventually the mixture will begin to rise in temperature again and being to thicken.  Around 230* you will begin to see a significant change, this is about 30 minutes since you started.  The mixture will bubbly continuously.  Keep stirring.  When the mixture reaches 245* the resulting caramel will harden when cooled.  You can test this by spooning some onto a plate and placing it in the freezer for just a minute.  When you take it out it should be very hard, not runny at all.  At this point, you can either pour the hot caramel into a buttered baking pan (8 X 8) and let cool, or you can allow it to cool and thicken slightly in the pot 
and dip clean, dry organic apples into to caramel.


You can see in this picture how my caramel pooled around the base of the apple.  That is just because I am impatient and began dipping my apples in the very hot caramel.  The second tray came out much better!  

After allowing the caramel apples to harden (about 20 minutes) I dipped them again, only halfway this time, in chocolate (corn free and vegan enjoy life chips) mixed with a couple tablespoons of almond milk to thin it.  I then quickly dipped the apples in either chopped almonds (for the adults) or sprinkles (for the kids)!

so festive!

The apples were a huge hit.  It wasn't until later that I realized I served sugar (organic apples) covered in sugar (corn free dairy free caramel) dipped in more sugar (chocolate)!  Wow, maybe next time I'll just make the brownies... but even they are better with caramel! 


(If you want to keep the caramel in a liquid state to use as a sauce for brownies or ice cream or even in a hot fall beverage, heat only to 230*F and keep it in a glass jar with a tight lid and refrigerate.  Yum!)


Friday, August 31, 2012

Good Food Friday: Strawberry Milk Kefir Popsicles


Got milk kefir? I do (again) and I am trying to be purposeful in how I use it. No longer do I want my kefir to take up the refrigerator door but instead I am looking for creative uses for this yummy, good for you, beverage. We are enjoying a blast of super heated air the last couple days here in Ohio and the weather has brought cool treats to mind. Here is my recipe for strawberry milk kefir popsicles the perfect treat any time of day.

Ingredients:

  • 1 1/4 cup milk kefir
  • 3 Tbsp organic sugar 
  • 1 Tsp vanilla extract
  • 4 medium (frozen) strawberries & 1 large (frozen) strawberry
Directions:
In a blender combine all ingredients but large strawberry. Blend until smooth. Add large strawberry to blender and "chop" strawberry for frozen chunks of fruit in popsicles. Pour liquid into popsicle mold (I purchased mine for $5.00 at a thrift store). My mold can make 10 popsicles but the recipe only makes 5. This took all of no time at all. Perfect if you have little ones running around your feet. Freeze until frozen (yup I said it... did you see the "recipe for making ice cubes" the comments are too funny!).

Five popsicles is more than enough for my little family. There is a lot of room for creativity in this recipe. Sugar can be replaced with stevia or raw honey. Fresh strawberries can be used instead of frozen. I just have frozen for my breakfast smoothies (also milk kefir or homemade greek yogurt). 

For another version of strawberry kefir popsicles and a quick idea of just what kefir is visit here.

Do you drink kefir? How do you use your surplus? Feel free to leave a comment (they are always welcome!) or join the conversation on our Facebook page. 

Until next time!

Friday, January 13, 2012

Homemade Greek Style Yogurt (version 2)

I recently realized while going through the motions in my kitchen, making Greek style yogurt, that I have been keeping a secret from you.  That the way I make my yogurt has changed.  I had found new shortcuts and before I had time to tell you it became habit.  So yesterday while I was catching up in the kitchen, baking breads and cooking beans, I took a few photos of my latest gourmet shortcut to share.


Into three glass quart jars (you could use clean applesauce jars or even pickle jars) spoon two tablespoons of store bought yogurt into each jar.   Let the yogurt come to room temperature.


In a large stainless steel pot, allow three quarts of milk to come to room temperature.  Then heat the milk slightly until when test it with a finger, you can't feel it, hot or cold.  Body temperature, I guess.


Pour the warm milk into the jars.  Put a lid on each.  (The red funnel is part of a canning kit and makes filling almost any jar so easy.)


Find a helper and shake each jar to distribute the yogurt into the milk. 


Fill a cooler with bath temperature water.  Cram the jars into the cooler and shut the lid.


Set the cooler in a nice warm spot (mine is always on top of the freezer - this is also where I set bread to rise) and let it sit undisturbed for 24 hours.  I have found that letting the yogurt sit for longer makes a thicker yogurt.  Over Christmas when things were a bit hectic here, I accidentally left it for 48hrs.  It looked like curddled milk but after I strained it, it looked fine.  A tad bitter but fine.


Line a bowl with a clean pillowcase.  Pour the yogurt into the pillowcase.


Tie it up and let it drip until the volume is reduced by half.  Since I made three quarts of yogurt, I let it strain until I have collected a quart and a half.  This will leave you with one and a half creamy quarts of fresh yummy yogurt. Since it is almost identical in consistency to sour cream, it can be used cup for cup in traditional recipes. My husband and oldest son eat this stuff by the bucket, the bucket, I swear.  You should see their idea of a serving size.  I figure I'm saving some serious cash making the stuff myself.  We make ours plain and unsweetened but for a serving you can sweeten it up with a tablespoon of some homemade jam for a real treat.  


----------------------------------------------------------

P.S.  

In the kitchen I was fooling around with a new gluten free bread recipe.  Sandwich bread, breakfast bread.  No artificial binders or fillers.  So healthy, made with almond flour.  While almond flour is getting plenty of talk (and for good reason!) it is a bit expensive.  I ground my own in the Vitamix and after mixing was pleasantly surprised to pull this out of the oven....


Super rich and healthy... very substantial.  A bit much for the little ones but an awesome grain free bread for a grown-up breakfast.  Highly recommended!  

almond flour bread recipe from making love in the kitchen - meghan telpner

Friday, September 9, 2011

Good Food Friday : Tuna Cabonara

This is my absolute favorite fast supper.  I honestly can not believe I haven't shared this with you!  It comes together super quick with staples I'm sure you already have in your kitchen and even being a pasta dish I packs in a ton of protein.  My only complaint is that this dish can be awfully "beige" and colorless so please do your eyes a favor and add the veggies!


My usual recipe for this makes enough for our seven but the ingredients are totally flexible.  You really can't go wrong.

Tuna Cabonara

Ingredients:

  • pasta
  • tuna
  • onions
  • red bell pepper (optional, in fact most times I don't have this but its great for color)
  • fresh parsley (again optional but great for presentation)
  • Parmesan cheese (fresh grated) 
  • eggs, beaten
  • salt
  • oil or butter
Directions:
  • Boil pasta in salted water until al dente. 
  • While pasta is boiling, saute onion and peppers in oil or butter.  When veggies are softened, added canned strained tuna.  Cook until warm throughout.
  • Have cheese grated and eggs beaten
  • Drain pasta, but do not rinse.    Toss pasta into the tuna mixture and quickly toss with eggs and cheese.  The residual heat from the pasta will cook the eggs and melt the cheese.  
  • Sprinkle with a pinch of salt and stir in parsley.  Serve immediately. 
I usually let the number of cans of tuna dictate the beaten eggs.  In our house, it is three cans of tuna to three eggs.  See, plenty of protein.  This recipe always makes it.  No matter what I have on hand I can pull this one off.  No peppers?  How about peas?  No spaghetti?  Substitute rice.  Just don't skip the cheese or eggs.   The combine and become the creamy sauce.


Friday, September 2, 2011

Good Food Friday : Gluten Free Banana Bread

The reason you should make this banana bread...


Because there are more bananas in it than any other ingredient.

And no oil. 

Actually no added fat.

A nice surprise for the little ones up early for school.  Make the batter the night before and pop it in the oven first thing in the morning.  The kids may not even need you to drag them out of bed.  


Ingredients:
  • 4 brown bananas, smashed
  • 2 eggs
  • 3/4 cup sugar
  • 1/2 cup applesauce
  • 1 2/3 cup rice flour
  • 1/3 cup tapioca flour
  • 1/4 tsp salt
  • 1 tsp baking powder
  • cinnamon
  • pinch of nutmeg
  • (chocolate chips or nuts - optional)
Directions:
  • Mix everything in a bowl.
  • Pour into greased and floured mini baking pans (3 of them)
  • Bake at 350* until medium brown on top and a toothpick inserted comes out clean (So sorry I don't even have a time estimate.  My usual batch is quadruple this and I didn't time this batch, surprise, just put it in while packing lunches.)

Also makes an excellent after school snack or tea time, or before bed... not that I would know, or that I actually ate the bread that many times today.  I've said too much.  Enjoy!


Friday, February 4, 2011

One Bowl Eggplant Parm

Lauren and I have been cooking together since college. It is the activity we look forward to most when getting together, besides crafting and cuddling babies. We each contribute foods to a pile of eclectic ingredients, mostly vegetables, that our respective families have yet to fall in love with. Always experimenting and rarely measuring, we have crafted some amazing meals.

Yesterday it was this dish. Seriously, too easy. Eggplant parm in only one bowl with photos to prove it. I know its hard to believe. Such a great comfort food. Serve in place of pasta or other carb with a protein and a salad for a memorable meal.

One Bowl Eggplant Parm
excuse the measurements...

Ingredients:
  • 1 eggplant
  • a couple tablespoons of flour
  • 1 egg
  • splash of milk
  • bread crumbs (seasoned)
  • enough oil to cover the bottom of a fry pan
  • 1 can diced tomatoes
  • mozzarella cheese
Cube eggplant. Toss in a deep bowl with flour.


Whisk egg with milk in a small cup. Dump egg mixture into eggplant. Toss to coat. (I skipped this picture. It looked really gross.) Throw in handfuls of breadcrumbs and toss to coat. Continue to toss and add breadcrumbs until the eggplant is well coated. Heat oil over medium heat.


Dump eggplant into hot oil and fry until cubed are lightly browned.


Transfer to a medium casserole dish. Add diced tomatoes, stir and cover with shredded mozzarella cheese and a light dusting of bread crumbs. Bake at 350* F until warm and bubbly.


Enjoy while hot and eat it with a spoon.

Thursday, January 27, 2011

Black Bean Pumpkin Soup

(the girls enjoying an afternoon in my grandma's new kitchen)

I spent a good share of my childhood at my grandparents house. My grandma, like yours, is the worlds best cook. Her most coveted recipes are her desserts and her soups. Dessert. The word speaks for itself. But if anyone knows me they know there is nothing more appetizing than something hot consumed out of a bowl with a spoon! Grandma made soup every day of the year. No kidding. Even on the absolute hottest afternoon we were eating soup. Not "normal" stuff like chicken noodle, but instead soups made from odd ingredients like pickles or beets. So many of my evenings at her home were spent in the kitchen drinking cup after cup of hot tea with lemon and honey and baking yummy stuff. Grandma doesn't have cook books or recipe cards, but cooks from memory with handfuls and pinches as measurements. Weighing ingredients in her palms and mixing with her hands. For me, soup is not just food, but memories. And the best part is now my kids love soup. I make the "normal" stuff and some crazy stuff. I'm constantly searching to find my next big hit. Well, here it is folks. Found with luck and proved to be a keeper by many. In the past three weeks its been requested at a two lunches with friends and a birthday party. People have said its like a curry, which I have yet to taste let alone attempt to make. It is spicy and creamy, fills you up like a bowl of chili and just plain good!

Black Bean Pumpkin Soup

Ingredients:
  • 1 tsp crushed red pepper flakes
  • 2 tbsp olive oil
  • 1 cup heavy cream
  • 3 cups broth
  • 1 1/2 cups cooked pumpkin
  • 3 tbsp brown sugar
  • 1 tsp cumin
  • 1/2 tsp chili powder
  • 1/2 tsp coriander
  • 1 15oz can black beans (I used dried, because I'm short on money but long on time!)
  • 3/4 cup grated sharp cheddar cheese
Directions:

Saute red pepper flakes in oil. Add heavy cream, broth and pumpkin. Stir until blended. Whisk in brown sugar and spices. Simmer for 20 minutes. Add beans and cheese. Rewarm over low heat, whisking occasionally. Serve with dollops of sour cream! Serves 4

---- Recipe from Mary Janes Farm magazine ----

Another reason I tried and loved this recipe .... I still have so much pumpkin I froze last fall to get through...


Twenty organic pie pumpkins grown from seed in my own backyard.


My goodness! What a mess...


... but soooooo worth it!

Since you've got that pumpkin out, why not take a look at another pumpkin recipe...

Tuesday, January 18, 2011

Recording Recipes


Today's project is to record recipes out of several library books so that I can return them to the library. One of the books I have had out for about three months (yikes!) and feel a duty to return it. Don't worry I have been renewing them...

We have an AWESOME library system in the county I live in. The programs, books, online catalog, etc is just stellar. I can request and renew books without ever going to the library, but I am just amazed by what we can do at the actual branches. We have a toy library available, audio library, DVD library and you can request items from around the state. I am sure you aren't impressed because you probably have a similar library system but I just have fallen in love with our library.

Tuesday mornings, Wade and I meet our good friends at our local branch for Baby and Me. It is amazing and Wade loves it. We sing, read, and do rhyming games to help develop language and a love of reading in young babies. Watching each of the babies grow and learn and laugh and play is such a joy. Thanks Jen and Isaac for picking us up this morning! We totally appreciate it. Enough aside...

I would be a book collector if my budget allowed. Every book I get from the library I want to own, well not every book but about 90%. I have to force myself to be responsible. Read it, use it, and return it. The cook books are great to have but eventually they have to go back and I am left feeling frustrated that I can't just call them mine. Thanks to Microsoft Office OneNote, which I am sure I am not using to its full, glorious, extent, I have devised a way to record and save my favorite recipes for easy look up.

Today I will record recipes from:
The Candida Control Cookbook - by Gail Burton
The Eat-Clean Diet Cookbook - by Tosca Reno
My Bread: The Revolutionary No-Work, No-Knead Method - by Jim Lahey
Natural Nutrition for Cats: The Path to Purr-fect Heatlh - by Kymythy R. Schultze (this book is for my cat, duh!)

Then next visit I can return these well appreciated books and get out new ones!

P.S. No I am not "dieting" but finding healthy recipes to live by, but yes, I do still have baby weight to lose. Wish me luck...

Friday, December 10, 2010

Christmas morning scones


First let me say that these wonderful scones are by no means only to be enjoyed on Christmas morning... they are also super for lazy Saturday's, afternoon tea with the girls and well... right this very moment! So simple and quick, try to find a reason NOT to make 'em!

Cranberry-Orange Scones

Ingredients:
  • 3 cups flour
  • 1/2 cup sugar
  • 2 1/2 teaspoons baking powder
  • 1 teaspoon salt
  • 1/2 teaspoon baking soda
  • 1 tablespoon grated orange peel
  • 1 stick butter (I used Earth Balance)
  • fresh cranberries
  • 1 cup orange juice (or milk)

Directions:
  1. Preheat oven to 400*
  2. Sift flour, sugar, baking powder, salt, baking soda into a large bowl. Stir in orange peel. Add butter and rub with your fingers until mixture resembles a coarse meal. Mix in chopped cranberries*. Gradually add liquid, tossing with fork until moist clumps form.
  3. Now its time to really get your hands dirty! Turn the dough over in the bowl until it begins to bind together. Its going to be sticky, its supposed to be! Form dough into rounds just slightly smaller than the palm of your hand. Transfer rounds to a baking sheet, spacing two inches apart, because these things get big!
  4. Bake until tops of scones are golden brown, about 18-20 minutes. Let stand on baking sheet for 10 minutes.
  5. Serve scones warm or room temperature with honey butter and a hot tea!

* I add three handfuls of cranberries chopped in my Pampered Chef chopper. Don't have one? No biggie. In my pre-Pampered Chef years this recipe still succeeded when I coarsely chopped them with a big knife!

I love to have this dough on hand. I make a bunch and then stick it in the fridge until guests arrive or I just need an afternoon treat!

Wednesday, November 10, 2010

Butternut Squash Soup

Easy-peasy fall recipe using squash!

Soups are big in my blue house. Growing up my grandma made soup every day of the year. Now I don't make soup every day but I do make soup all year round. Yes, I force my family to eat soups even in the summer. But fall soups are probably the best because nothing sounds better after raking leaves than heading home to a hot bowl of soup(except maybe hot chocolate... ) And this recipe is by far the kids favorite! This soup is soooo easy to make. Don't let the blender part keep you away from this recipe. Its too good to let an extra step scare you off. Plus butternut squash is inexpensive and can be found just about anywhere this time of year. Try it!
Butternut Squash Soup
Ingredients:
  • olive oil
  • 1/2 lb carrots
  • 3 whole ribs celery
  • 3 small onions
  • salt and pepper to taste
  • 1 quart cooked squash, cubed or pureed
  • 1 quart broth ( or 1 quart water and equivalent bouillon)
  • whole springs of thyme (a couple) and rosemary (about 4 inch sprig)
Directions:
  • In a large pot, saute onion, celery and onions in the olive oil. Season with salt and pepper to taste. When onions are translucent and other veggies softened, about 5-7 minutes, add squash and broth. Stir until combined. Add whole herbs. Bring to a simmer. Simmer uncovered for about 20minutes.
  • Remove whole herbs. Transfer in batches to blender and blend until smooth. Continue until entire pot is processed. At this point you can either reheat to serve it or freeze it for future suppers! ( I freeze mine in quart yogurt containers.)
(If you buy whole butternut squash, it needs to be steamed before you add it to the pot. The easiest way is to cut the squash in half, longways, scoop out the guts then place the hollowed squash cut side down in a shallow baking dish filled with one inch of water. Put it in a 350* oven for about 45 minutes to one hour. You want to be able to pierce the skin with a fork. When its soft, scoop out the insides and mash with a fork or run it through a food mill. Now continue with the recipe.)

Monday, October 25, 2010

Pumpkin Bars with Maple Whipped Cream


Pumpkins are all over the place right now. On front porches, in holiday cards, on kids t-shirts and of course, food! For some reason I crave all things pumpkin right now. In my opinion, foods this time of year must contain pumpkin. Coffee, cookies, breads... I think you know where I am going here... So when we hosted our fall dinner party, dessert was simply assumed to be pumpkin. This wonderful cake is made in a 9X13 dish but could easily be made into two 9 inch rounds and frosted. The original recipe called for a cup of oil (yikes!) Since that grossed me out, I replaced it with applesauce. Still super moist! And the only thing better than dessert at the end of a great party is getting sent home with more dessert to enjoy as breakfast the following morning. I made one recipe for the party and then another half recipe to make individual muffins to send home with each guest. I also gave each couple a half-pint of homemade pumpkin butter. Like I said, the theme is pumpkin!

Pumpkin Cake with Maple Whipped Cream

Ingredients:
  • 4 whole organic eggs (preferable from your own chickens)
  • 1 2/3 cup organic cane sugar
  • 1 cup applesauce
  • 15 oz can pumpkin or about 2 cups fresh steamed and smashed squash
  • 2 cups flour
  • 2 teaspoons baking powder
  • 1 teaspoon baking soda
  • 1 teaspoon salt
  • 2 teaspoons cinnamon
Directions:
  • Preheat over to 350*. Grease and flour a 9X13 pan.
  • In a large mixing bowl, whisk eggs, sugar, applesauce and pumpkin until combined.
  • In a separate bowl, sift together flour, powder, soda, salt and cinnamon.
  • Add dry ingredients to wet and stir until just combined.
  • Bake for 30 minutes. Test with a toothpick. Cool completely. (Cake is awesome the next day!)
Maple Whipped Cream
  • whipping cream
  • maple syrup (the real stuff!)
Five minutes before you would like to serve dessert, chill a large stainless steel bowl and
beaters in freezer. Take the bowl out of the freezer and pour whipping cream in bowl. Begin to beat on high. Drizzle syrup over cream, to taste. Beat again until the cream begins to hold shape and can round up high on a spoon. Do not over beat.

The cream is delicious and beautiful on the cake and simply perfect served dolloped on coffee and sprinkled with cinnamon or pie spices. Please do not attempt to top this gorgeous fall desert with store bought whipped cream topping as opposed to the real thing. I promise, once you try it, you will NEVER go back!
Related Posts Plugin for WordPress, Blogger...