Showing posts with label upcycled. Show all posts

Monday, January 28, 2013

Advent Calendar 2012

Every year after Christmas I carefully take down and store our advent calendar because I always plan on using it the following year.

And at the beginning of the next Christmas season I make a new advent calendar.

I can help it.  I'm a compulsive crafter.  

(You can see our 2010 calendar here and our 2011 calendar here.)

This year I wanted to use the silhouette.  

And chicken wire.

And old fencing.  

This is what we celebrated with this year.


Each tag is actually a pocket which held our daily activity.   


The pockets have a front piece and a back piece that were sewn together.  (Did I mention that I also wanted to use my sewing machine?)  


 We used ribbon and twine to tie the tags to the chicken wire.


 I made the frame with some old fencing and staples.


Definitely my favorite yet.  This may actually be fantastic enough to ward off my craft addiction and need to reinvent the advent calendar next December.  Perhaps I could pour the effort into homemade stockings... or a tree skirt... or ... hmm...

*****************************************************


P.S. I have already uncovered my Valentine's Countdown Calendar already.  Come on February!


Monday, April 30, 2012

A Bathroom Redecorated...

I'd gotten tired of my first floor bathroom.  You know, the one that does double duty as a pretty guest bath as well as a convenient place to rinse off sandy children.  It was too dark (red, tan and brown) and just worn out.  After painting the kitchen (post soon to come!) I had a new fresh color to work with.  So with only the cost of a new shower curtain I pulled together a new look.

the new shower curtain

After raiding a friends dilapidated barn with only a single glove and a wonder bar (awesome), I scored this crate.  In its not so distant past it was a nest box in a chicken coop.  Needless to say I scrubbed this thing until my arms almost fell off.  Then after some sanding and a coat of stain, I had a nice clean box.  At first I was going to throw it in the corner and pile it with clean towels but I had been looking for a cabinet to hang on the wall.  Could I mount the crate to the wall?


Definitely.  It's rustic and old fashioned.  And no matter how hard I try or how much I want to avoid it, that is the direction this house will always take.  Use what you have...

The next project was something to fill the opposite wall.  I love browsing prints and frames at stores but can never convince myself to buy any.  I'm addicted to originals.  I built this frame using old fencing and staples.   (My first solo radial arm saw project.  I was scared to death!)


Some paint and some stain to distress it and I was happy.  I had seen bloggers framing sticks and thought I would give it a try with some of my grape vine trimmings.


Another hit.  Wow, could this room be coming together so fast with really nothing but time invested?

The soap dish?  The the base of a planter.  Painted and stained.


The curtain?  Ruffles?  Me?  Hmm... not so sure if I'll keep this one but I'm trying it.  Just muslin and literally scraps I ripped off an old table cloth in the basement.  The only thing I do like is the unfinished look.


Keeping with the "bird" theme (nest box, shower curtain, twigs... see it now?) two brass birds with a coat of white spray paint.  So pretty perched on my mirror ledge.  


Homemade milk glass with upcycled food jars... think vanilla extract, grinder spices and artichoke hearts.


I'm pretty sure that I took about one hundred photos of this tiny room. That's about 95 too many even by my standards.  But in my defense I have been suffering with this room for years. So just a few more if you please...


(Ok, a remodel  for the price of a shower curtain AND a stack of fluffy new hand towels...)

Overall, I like it.  So much brighter and clean.  For a couple days every time I walked past the room I had to stop, turn on the lights and sigh.


A finished project.

One room down...


Saturday, December 17, 2011

Upcycled Homemade Dog Sweater


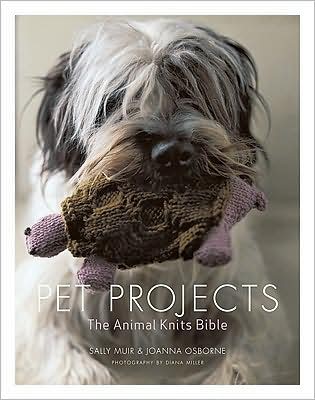
I can't tell you how many times I have checked out the lovely book Pet Projects from the library meaning to make something beautiful for the animals. I can't knit, but I can sort of sew. There are several projects in the book with human sweaters re-purposed into lovely dog coats and I was determined to make one. Granted it has taken me at least a year to get around to making one.  

The majority of the instructions can be found on Martha Stewart's web site under Wool Cardigan Dog Coat. There is also a great video with author Joanna Osborne and Martha Stewart making the cardigan step-by-step. I ended up doing a few things differently so I will show you how I made my homemade dog sweater. I think now that I have made one sweater, following ones will take a lot less time, however this ended up stretching out for days because of all the other craziness going on. In summary, it wasn't just one, two, three like I thought it would be, but still a fun project.

Steps:


1. Start with free sweater (I looked for a wool one to shrink but I couldn't find one). Cut off sleeves to make cap sleeves.


2. Cut off cuffs. My sweater cuffs are larger than the wool sweater in the video and example in the book (see links above). You will see what I did with them later on. 


3. Turn inside out and try on your dog. Obviously this is very, very big on Lacey, my Wire Fox Terrier. I will have a lot of fabric to cut off once pinned and sewed. 


4. I remove a 3 inch portion of the sweater above the bottom cuff and saved the cuff as well. 


5. Leave sweater inside out and try on dog again. Now it is a better length (doesn't hang over her tail). I gather the bottom (from the front between the legs and under her belly) in safety pins making it fit the form of her body. She is a willing subject but I didn't want to stick her with straight pins as I pulled the sweater on and off. I also pin from the neck hole and down the shoulder and arm to make it "fit". You can see this clearly on the video.


6. Here is the sweater off but pinned. I would switch to straight pins before putting the sweater through your sewing machine. I know it is an extra step but safer for your machine. All fabric below the safety pins will get cut off. 


7. Here is the sweater right side out starting to "fit". I have cut off the extra fabric 


8. I have completed both arms and attached the cuffs to the arm holes with colorful embroidery thread. Let me tell you with the longer cuffs that was a MAJOR pain. No pictures of that step...

I keep the arm cuffs rolled up but they can be down for "long sleeves". I have used straight pins to attach the bottom cuff back to the sweater. I will use more embroidery thread to sew it back on. 


The finished sweater.


Another view of the finished sweater. See how it still hangs between her front legs a bit. I am going to sew that (taking it in) to make it fit better. I will add to the post once I do. 


Close up of the stitching for the back cuff. Very handmade.


I dug in my bead box and found some crystal beads. They add a girly touch around the neck line. 


Have fun making your sweaters! I can't wait to make more... although maybe it can wait until the new year. 


Related Posts Plugin for WordPress, Blogger...