Pages

Friday, December 30, 2011

In a Moment of Weakness

OK... I did it. I caved. I requested an invitation to:  


I have received this lovely email:

Hi!
Thanks for joining the Pinterest waiting list. We'll be sure to send you an invite soon. In the meantime, you can follow us on Twitter. You can also explore a few pins.

We're excited to get you pinning soon!
-Ben and the Pinterest Team

Honestly, it was a quick visit with my lovely cousin over Christmas that sold me. She teaches art and photography and finds Pinterest to be extremely useful in organizing. I thought... I want to be more organized. Sold! No longer will I have a folder on my hard drive labeled "Inspiration". Instead, soon... one of these days, I will have a Pinterest invite!

Do you have a Pinterest account?

Saturday, December 24, 2011

Preparations...

Christmas Eve preparations, my favorite day of getting ready.  Today at our blue house we are busy...


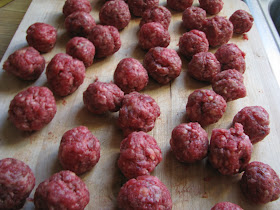
rolling 100's of tiny meatballs (from one of our cows)...


packaging foods to give as hostess gifts...


(I think they are going to love them!)


enjoying an Americano, cream, no sugar, ...


making cookies for "Santa"... at his father's request...


helping, or as I call it NOT helping... but she is so darn cute...


and paper wreaths all stacked in a row...

Whew!

Today's and tomorrow's advent cards all have to do with visiting family.  Last night we camped out under the tree.  And when I say "we" I mean the kids.  I slept in my bed just around the corner.   The kids have been counting down the days and now the final hours until Christmas morning.  I know they are excited for the gifts, they are children.  But I hope that in time the emphasis on the presents will fade and the special gift of Jesus born on the silent night so long ago will bring them even greater joy.  

... and if I don't see you tomorrow... 

Merry Christmas, dear friends!


Wednesday, December 21, 2011

My Chocolate Covered Peppermint Marshmallows

Remember these from last year...it technically may have been this year but you know what I mean.  I said something like "you can bet I'll be making these babies next Christmas."  But December came and I forgot!  One night I was snooping around my own blog (such a nerd but sometimes it's fun to see where we were a year ago) and I found that post.  My mouth began to remember and water.  For inspiration I searched images for the recipe (what can I say?  I'm very visual) and found this beautiful tutorial.  Aren't your taste buds simply aching to make this!


I splurged and bought three bags of mallows and two semi-sweet chocolate chips (the candy canes were already at home - I needed 14 of them). This made just over 100 confections.  Not quite candy, more than a cookie...  When you indulge just try and remember it is puffed sugar dipped in chocolate sugar covered in peppermint sugar.  Whoa!


Plenty for gifts, parties and some snacking for those late-night wrapping sessions.


...............................................................................

We still have gifts to make but the shopping is done!  The gift wrapping sessions begin tonight but the homemade gifts are still being cranked out.  I still would like to make some paper wreaths, lemon curd and homemade version of Bailey's Irish Cream.  Hey, I still have three days!


Tonight our advent activity is to dine by Christmas and candlelight.   The kids have gathered candles and plugged in all the lights.   We are waiting for daddy to come home so we can eat supper.  (We are having this tonight!  Yum!)


How is the Christmas season looking at your place?


Saturday, December 17, 2011

Upcycled Homemade Dog Sweater


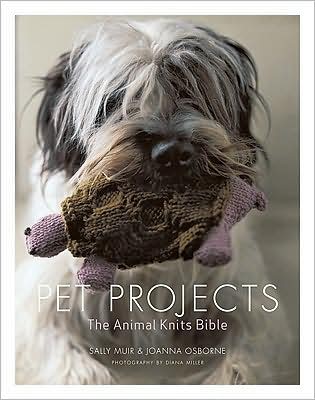
I can't tell you how many times I have checked out the lovely book Pet Projects from the library meaning to make something beautiful for the animals. I can't knit, but I can sort of sew. There are several projects in the book with human sweaters re-purposed into lovely dog coats and I was determined to make one. Granted it has taken me at least a year to get around to making one.  

The majority of the instructions can be found on Martha Stewart's web site under Wool Cardigan Dog Coat. There is also a great video with author Joanna Osborne and Martha Stewart making the cardigan step-by-step. I ended up doing a few things differently so I will show you how I made my homemade dog sweater. I think now that I have made one sweater, following ones will take a lot less time, however this ended up stretching out for days because of all the other craziness going on. In summary, it wasn't just one, two, three like I thought it would be, but still a fun project.

Steps:


1. Start with free sweater (I looked for a wool one to shrink but I couldn't find one). Cut off sleeves to make cap sleeves.


2. Cut off cuffs. My sweater cuffs are larger than the wool sweater in the video and example in the book (see links above). You will see what I did with them later on. 


3. Turn inside out and try on your dog. Obviously this is very, very big on Lacey, my Wire Fox Terrier. I will have a lot of fabric to cut off once pinned and sewed. 


4. I remove a 3 inch portion of the sweater above the bottom cuff and saved the cuff as well. 


5. Leave sweater inside out and try on dog again. Now it is a better length (doesn't hang over her tail). I gather the bottom (from the front between the legs and under her belly) in safety pins making it fit the form of her body. She is a willing subject but I didn't want to stick her with straight pins as I pulled the sweater on and off. I also pin from the neck hole and down the shoulder and arm to make it "fit". You can see this clearly on the video.


6. Here is the sweater off but pinned. I would switch to straight pins before putting the sweater through your sewing machine. I know it is an extra step but safer for your machine. All fabric below the safety pins will get cut off. 


7. Here is the sweater right side out starting to "fit". I have cut off the extra fabric 


8. I have completed both arms and attached the cuffs to the arm holes with colorful embroidery thread. Let me tell you with the longer cuffs that was a MAJOR pain. No pictures of that step...

I keep the arm cuffs rolled up but they can be down for "long sleeves". I have used straight pins to attach the bottom cuff back to the sweater. I will use more embroidery thread to sew it back on. 


The finished sweater.


Another view of the finished sweater. See how it still hangs between her front legs a bit. I am going to sew that (taking it in) to make it fit better. I will add to the post once I do. 


Close up of the stitching for the back cuff. Very handmade.


I dug in my bead box and found some crystal beads. They add a girly touch around the neck line. 


Have fun making your sweaters! I can't wait to make more... although maybe it can wait until the new year. 


Friday, December 16, 2011

Good Food Friday: Venison Stroganoff

Venison Stroganoff

We eat primarily venison, chicken, and pork. Soon we will eat primarily venison, chicken, and rabbit (all of which we can raise or hunt ourselves). If you are a reader of Nourished Kitchen, the Weston A. Price Foundation, or an advocate of traditional or real foods, you will know that on the list of Good, Better, Best: Traditional Foods for Every Budget has wild game under the best red meats you can eat. I have cooked for the last three years, substituting venison for beef. The only exception to that rule is that I like an occasional pot roast and my husband likes to get more ground from his deer. I cave to the buy one get one free sales for beef roasts about twice a year.

Here is a quick and easy recipe for venison (you can of course use beef) that is a family favorite. Don't know how to get venison if you don't hunt? Ask around! You maybe surprised at how many hunters you know who are willing to give you a venison steak or two to experiment with. You maybe hooked ever after. You can of course buy venison (which is farmed in the state of Ohio... you can't buy wild venison) or see if you can barter with someone for some venison meat. We barter hunting rights on a small two acre suburban lot in a township near by for deer meat.

Ingredients:
1 lb. venison steak, about 1/2" thick
2 Tbsp. butter
1 lb. mushrooms, sliced
1 medium onion (minced about a 1/2 cup)
1 can (10 1/2 oz.) condensed beef broth
2 Tbsp. ketchup
1 clove garlic, minced
1 tsp. salt
3 Tbsp. flour
1 cup sour cream
3 to 4 cups hot cooked noodles (I use egg noodles for this meal)

Directions:
Cut meat into bite size pieces. Melt butter in large pan or skillet (I use cast iron). Add mushrooms and onions and cook until onion is tender, then remove them from the pan. In same pan, cook meat until light brown (for venison I still leave a tiny bit of pink because I don't want to over cook the meat). Reserve 1/3 cup of the broth, stir in remaining broth, ketchup, garlic, and salt. Cover and simmer 15 minutes.

Blend reserved broth with flour, stir into pan. Add mushrooms and onions back into pan. Heat to boiling, stirring constantly. Boil and stir 1 minute. Reduce heat to low. Stir in sour cream and gently heat (don't boil). Serve over noodles.

Tops this meal takes about 30 minutes. There is rarely enough left for one person to have left overs in a family of four. Enjoy!

Thursday, December 15, 2011

Life After Kale....

I may have said this too many times on this blog but I am spoiled.   I am fortunate to run out to the chicken coop when I am short eggs for a recipe, to reach out my backdoor to grab herbs for suppers and to generally eat fresh and well out of my garden.   The land, the open spaces, the quiet.  Yes lots of good things to be thankful for but kale has spoiled me the most.  This often despised vegetable has worked its way into my heart and daily meals.  I find myself craving it!   Last years planting (after not putting the garden to bed the previous fall) had sprouted curly green growth in just April of this year.  Imagine having your favorite veggie at your beck and call for eight full months.  And then, on particularly hard frost night, it's gone.  This friends is what heartbreak looks like to a grower...


Sure it is sunny but all that brightness is deceiving.  It's freezing out there.  A confession?  I took this picture from my kitchen window because I didn't want to pull on a coat and shoes!  But the good news is I managed to get one last good pick before the sun came out and withered the frost covered leaves.  This is what happiness looks like...


I wish I could tell you these leafy greens are washed and resting comfortably in my crisper but they are not.  Gone already.  Cooked up and taken to a family supper.   What is a kale addict to do when she has no more free kale?  Buy it?  It's just not the same.  It feels like cheating to me.   Ah... farewell kale.  See you in April.


Wednesday, December 14, 2011

Handmade Baby Bow Tie

Yesterday, Jackie & I gathered at a dear friends house to enjoy movies (Water for Elephants specifically) and bake and eat Christmas cookies. Jackie had hinted at a homemade bow tie for Wade but I knew it might be hard on her already pressing schedule. She does so much! 

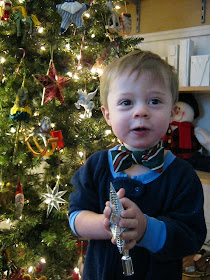
Well to my great surprise she was able to take an old tie and make this amazing and super cute bow tie for Wade to wear on Christmas Day
 (and to Christmas Eve church).


Look how AMAZING it looks with
Wade's Christmas outfit.

A bow tie for me?!


Look at those shining eyes. Learned that from Ashley Ann.

Mommy HAD to put me in my Christmas outfit. 

Thanks Aunt Jackie!

There isn't a step-by-step tutorial for this one because Jackie made it at like 1:00 A.M. but I do have the link Jackie used to make the bow tie.

Of course as with every project you improvise with your own skills and know how and with what you have. If you are dying to know how she made this baby bow tie please leave a comment. We love your comments no matter what of course!


Tuesday, December 13, 2011

Making Your Own Baby Doll Clothes


Before I had girls (when I only had three loud, crazy and constantly dirty little boys) I was sure that little girls and their intense love for all things pink and frilly was a learned thing.  And then came Eden.  As soon as she was talking she talked of babies.  As soon as she was walking she was pushing a buggy.   Then came Alette.  With Eden no longer the baby herself she watched me and learned how to carry her dolls on her hip and how to burp them over her shoulder.  Today Alette, while not a fan of pink or skirts as much as Eden, has an equal love for baby doll.  She is a bit more adventurous than her older sister and the dolls have seen the sandbox, the park and the unfortunate bottom of her brothers shoes.  Needless to say, the dolls clothes really tell the story, stained no matter how many washes or sun bleaching.  Every couple of months, I dig through clothes that the girls have outgrown and find some cute ones to make into doll clothes.  This time I converted one tshirt into a romper and one into a pink dress.  Can you guess which outfit is for which daughter? Here are the finals...

 Eden

Alette

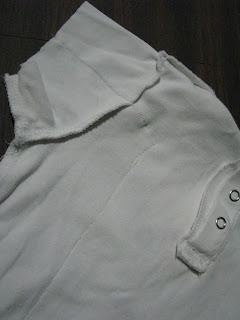
While this is pretty much a straight forward transformation and the pictures tell most of the story, I can give you a few hints to success.  First, choose shirts that button or snap around the neck.  Baby dolls have a big head and skinny neck so while a jersey fabric will stretch over their heads it may still be much too loose around their necks.  I used sizes 6-12 months for my 12 inch dolls.  If your dolls are larger, just look for bigger sizes.   Remember that short sleeved shirts will most likely fall to a doll's wrist, so no hemming and still a pretty finished look.   Also remember that this project is for an excited little girl.  Perfection need not be your goal, just being rewarded with big smiles and warm hugs. 

Measure where you want the sleeve to end and cut off the excess fabric.  You could hem the rough edge (and in some of my previous attempts I have) but didn't here.


Lay the doll on the shirt to see how wide you need the armhole and torso.  I eyeballed it. 


 Sew and cut off the extra fabric.  One side down one to go...


Sew an inseam.  Again I just guessed.


Cut out the u-shape and turn it right-side out.  All done?  Yup...


I chose this shirt because besides having an owl on it (her favorite - an "a-woo") the bottom was kind of ruffled so it didn't need to be hemmed.   And even though I didn't measure a thing it fits perfect.  Luck, people.  Pure stupid luck!


And when you have two little girls, you do everything double... This second one had to be a dress.  The neck on this shirt was huge!  I tuned it inside out and folded and stitched about an inch. Cut off extra fabric.  


After taking in the back, now the front of the dress was too big.  I decided to attempt pin tucks.  If you don't mind a seam down the front you can do the same as you did to the back. 


For the front seam, turn the dress inside out, like the seam in the back.  For the pin tucks, sew with the dress right side out.


Measure (guess) how long the doll's torso is, leave about an extra inch and then cut off the bottom of the shirt.  Save the left over fabric, this will become the skirt.


With the shirt inside out, stitch to create the arms and torso like the owl romper.  Cut off the excess fabric again and turn right side out to attach the skirt.  Since this was a short sleeved shirt, the length of the sleeve was fine, no cutting or hemming necessary.  Yay!


With the bottom of the shirt that you set aside in mind, decide how long you want the skirt to be and cut the skirt to that length plus a half inch more.  Baste a stitch and pull the thread and gather the skirt until the width of the skirt matches the width of the top.


Distribute the gathers evenly.  Sew the gathered skirt over the top, right side out.  Attaching the skirt this way  creates that sweet ruffle detail around the waist.


Eden and Alette are simply over the moon with their new baby doll clothes.  They are dreaming up new ideas for our next sewing session.  Who knows, if I can get a few free (after kiddie bedtime) minutes between now and Christmas, there may be a whole wardrobe of homemade doll clothes under our tree!