Friday, February 21, 2014

Good Food Friday: Grain Free Bread (Almond and Coconut Flour Bread)

I know, the name says it all.

Grain-free bread?

Doesn't even the most basic definition of bread involve, well, grain?

Yes.  And all of my homemade bread recipes involve all kinds of combinations of grains.  Rice. Quinoa. Oat...


But not this one.  I have been experimenting with almond flour for years.  Years.  And most of my recipes have been, honestly, barely edible by my definition (but not by the rest of the household, thankfully!).  This one was a success on its first attempt and verified in the weeks since.  I don't really follow all the eating styles and labels on foods theses days so I don't know who can enjoy this but it sure is a treat around here.  A nice slice with a bit of coconut oil has been my comfort food lately!


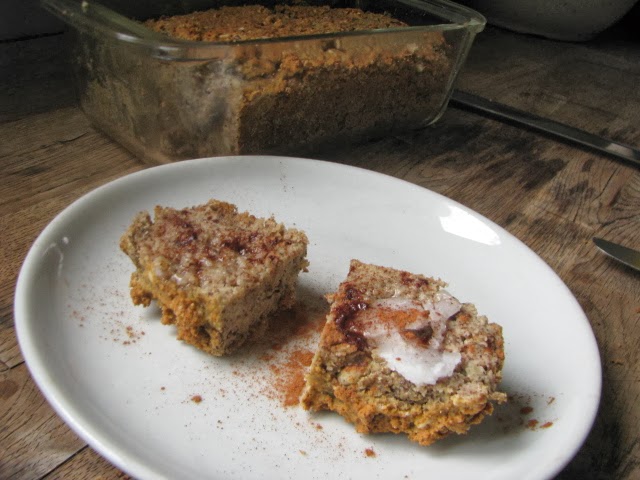
Grain Free Bread (Almond Coconut Flour Bread)


Ingredients:

  • 1 1/2 cups blanched almond flour
  • 1/2 cup coconut flour
  • 1/4 cup ground flax seeds
  • 3/4 tsp baking soda
  • 1/2 tsp salt
  • 1 Tbsp xylitol (you can use honey or sugar as well)
  • juice of 1/2 a lemon
  • 4 eggs
  • 1/2 to 3/4 cup water
Directions:
  • Preheat the oven to 350* F and grease a *slightly smaller glass loaf pan* with coconut oil. 
  • Combine dry ingredients and mix well.  Add lemon and eggs and mix well.  Start with the 1/2 cup water and mix until the dough resembles a stiff cake batter.  
  • Scoop batter into the loaf pan and smooth with wet finger or a wet spatula.  Don't worry, it will rise and fill more of the pan, I promise.   Bake for 35 minutes.  
  • Allow to cool.  Slice in pan.  Keep covered when stored.
This bread blew me away in the fact that unlike so many of the gluten free breads it continued to stay moist until the very last slice, about a week!  If you know gluten free bread, that is a miracle!  


Also, this is not a sweet bread.  If you like your stuff more on the sweet side, double the sweetener, or top with raw organic honey and a sprinkle of cinnamon (my preference)!


** Here is what I mean about the slightly smaller loaf pan.  Although both pans say 1.5 quart, this loaf was
baked in pan on the left.  It looks slightly more narrow than the one on the right.  Am I crazy?  By about an inch.   I bake all my gluten free loaves in this smaller pan because they tend to get a better rise.


Friday, February 14, 2014

Vegan Gluten Free Kani Salad

Remember Good Food Friday?

Well I am happy to say we have still been eating plenty of good food just not posting our recipes.  This has to change.  Not only so we can share our inventive eats but so we can have a record of them too.  Oh how many times I have searched my own blog for my own recipe!

This one is new to me.  Kani salad.  Ever heard of it?  Introduced to me this past weekend by some food adventurous friends.  It's basically cucumber and crab with spicy mayo. But it is never real crab at these places.  No.  That fake stuff. Made with random pulverized fish, weird food starches, poor quality vegetable oils and probably MSG? Definitely not on the gluten free or real food list.  So here is a cleaned up version.


(Excuse the terrible phone photo.  Next time I promise to snap a shot with my real camera
 before I devour.  But trust me, it's beautiful...)

Spicy Kani Salad


Ingredients:
  • cucumber, julienne (I use this handy tool)
  • vermicelli rice noodles, cooked and cooled  (I tend to keep this on hand soaking in the fridge.)
  • vegan mayo - I used Vegenaise (or my Creamy Garlic Tofu Dressing, to follow)
  • sriracha
  • brown rice vinegar
  • sesame seeds
Directions:
  • Toss cucumber and noodles. I tend to always use more veggies than noodles.
  • Top with a dollop of mayo, a squirt of sriracha and a splash of vinegar and a sprinkle of sesame seeds. Toss to coat evenly.   Adjust to taste!
I think the noddles basically nail the texture of fake crab, if fake crab could be considered desirable, if only for texture. This is pretty basic but I think it would be fun to add shredded carrot for more color, or tuna for protein, all on a bed of lettuce for a meal.  Some versions add mango for a slightly sweet yet spicy side dish.


And it always tastes better when eaten with chopsticks!

******************************************************

Creamy Tofu Garlic Dressing


Ingredients:
  • 8 oz organic tofu
  • 2 Tbsp cider vinegar
  • 1 Tbsp lemon juice
  • 1 Tbsp Braggs liquid aminos
  • 1 squirt mustard
  • 1 clove garlic
  • 1/4 cup organic olive oil 
  • 1/3 cup water
Directions:
  • Blend first 7 ingredients in a blender.  I used my Vitamix but I'm sure this would work in any decent blender. With blender running, slowly add oil in a thin stream.  Then add water the same way until you reach desired consistency.  It will look questionable a few times but it will come together in a beautiful creamy sort of way.
Use this as a dip base or as a mayo replacement.


Friday, July 12, 2013

Good Food Friday: Dutch Oven Balsamic Vinegar Sirloin Tip Roast

I seriously think this was the best roast I ever made. Seriously.

It was amazing. The secret? The rub. Balsamic Vinegar and rosemary spice rub. Even my non-roast loving family members loved this roast. 

Finished roast

What you need:

  • 3.5 lb Grassfed Sirloin Tip Roast
  • 1 - 2 Onions (depending on size and taste preference)
  • 2 - 3 Carrots sliced
  • 3 - 5 Red Skin Potatoes cubed
  • Rub (mixed in a separate bowl)

For the rub:

  • 2 Tbsp organic extra virgin olive oil
  • 2 Tbsp balsamic vinegar
  • 1 tsp dried oregano
  • 1 tsp dried rosemary (mine is crushed)
  • 1 pinch of powdered thyme 
  • 1/2 tsp black pepper
  • 1/2 tsp sea salt
If I had had fresh spices for the rub I would have used them but my herb garden is in transition right now (read between the lines it was ripped out because of weed over growth). 

Instructions:
Heat oven to 250. 

On your stove top using your dutch oven heat oil (I used about 1 Tbsp of bacon grease and 1 Tbsp of Coconut oil) and sauteed the onions until clear and added the sliced carrots as the onions started to brown. 

While doing that I rubbed the spice & balsamic mixture all over the roast and let it sit. 

When veggies are getting soft and look like below remove from your pot and set aside. 

Add more oil if necessary to the pot (I added a little more coconut oil) and brown your meat on both sides. About 5 minutes or so each side. 

Remove meat when browned and add potatoes, the cooked veggies, then meat to the dutch oven. 

Cover with lid and place in oven. Cook for 60 minutes. Remove lid and cook for another 30 - 40 checking for desired done-ness (is that a word?). I personally think meat should be medium. 

Remove meat and let rest for 5 or more minutes and slice against the grain. Serve.

Cooked vegetables

Roast with rub

Browning meat

Vegetables added back to pot before roast went on top.
Amazing flavors and tender, not over cooked, grassfed healthy meat. What is your favorite way of cooking a roast?!

Recipe inspiration and rub recipe (they grilled theirs):
http://purelyprimal.com/2011/05/23/balsamic-sirloin-tip-roast/


Monday, January 28, 2013

Advent Calendar 2012

Every year after Christmas I carefully take down and store our advent calendar because I always plan on using it the following year.

And at the beginning of the next Christmas season I make a new advent calendar.

I can help it.  I'm a compulsive crafter.  

(You can see our 2010 calendar here and our 2011 calendar here.)

This year I wanted to use the silhouette.  

And chicken wire.

And old fencing.  

This is what we celebrated with this year.


Each tag is actually a pocket which held our daily activity.   


The pockets have a front piece and a back piece that were sewn together.  (Did I mention that I also wanted to use my sewing machine?)  


 We used ribbon and twine to tie the tags to the chicken wire.


 I made the frame with some old fencing and staples.


Definitely my favorite yet.  This may actually be fantastic enough to ward off my craft addiction and need to reinvent the advent calendar next December.  Perhaps I could pour the effort into homemade stockings... or a tree skirt... or ... hmm...

*****************************************************


P.S. I have already uncovered my Valentine's Countdown Calendar already.  Come on February!


Saturday, January 12, 2013

Pinspiration and a Happy Handmade Christmas: the Boys

Pinterest can be a bit... girly.

Pink.  Cute.  Ruffles.

Shoes.  Scarves.  Hair.

Cookies.  Cakes.  Suppers.

You have to really hunt for the boys stuff.  But when you find it, oh, it's good.

This year for Christmas the boys got two necessary things for boys...

Beards.


Yes, this is a picture of me... 

finishing the beards... 

late at night... 

or early in the morning... 

giddy and greasy haired.

It was knitted with some crazy yarn by a pattern of my own.  Since it fit me, it was a bit large on their little faces so I'll have to spend another evening knitting some more.  Maybe I'll wear this one when I'm doing chicken chores or getting the mail.  Might cause some neighbors to do a double take.  Fun.  


and bows and arrows.


(tutorial here)

I will say, these little things shoot far!  I'd say 20 feet. Unbelievable.  Also after a couple days of normal boy usage the dental floss tend to get stretched out but its easy to swap out.  I got to use my wood burning tool again to freehand some tribal-ish designs.

I also did a t-shirt for a boy who got a real pair of youth boxing glove (for use on our heavy bag, not his siblings!)  His shirt is a white print on a black shirt of gloves hung around his next and the distressed word CHAMP on the back.  I think it is his new fav.  Yay!


(another blurry Christmas morning photo... 
what can I say?  We are up sooo early...)

My first total success.  Every child got a handmade gift.  Hope I just started a new tradition!


Friday, January 11, 2013

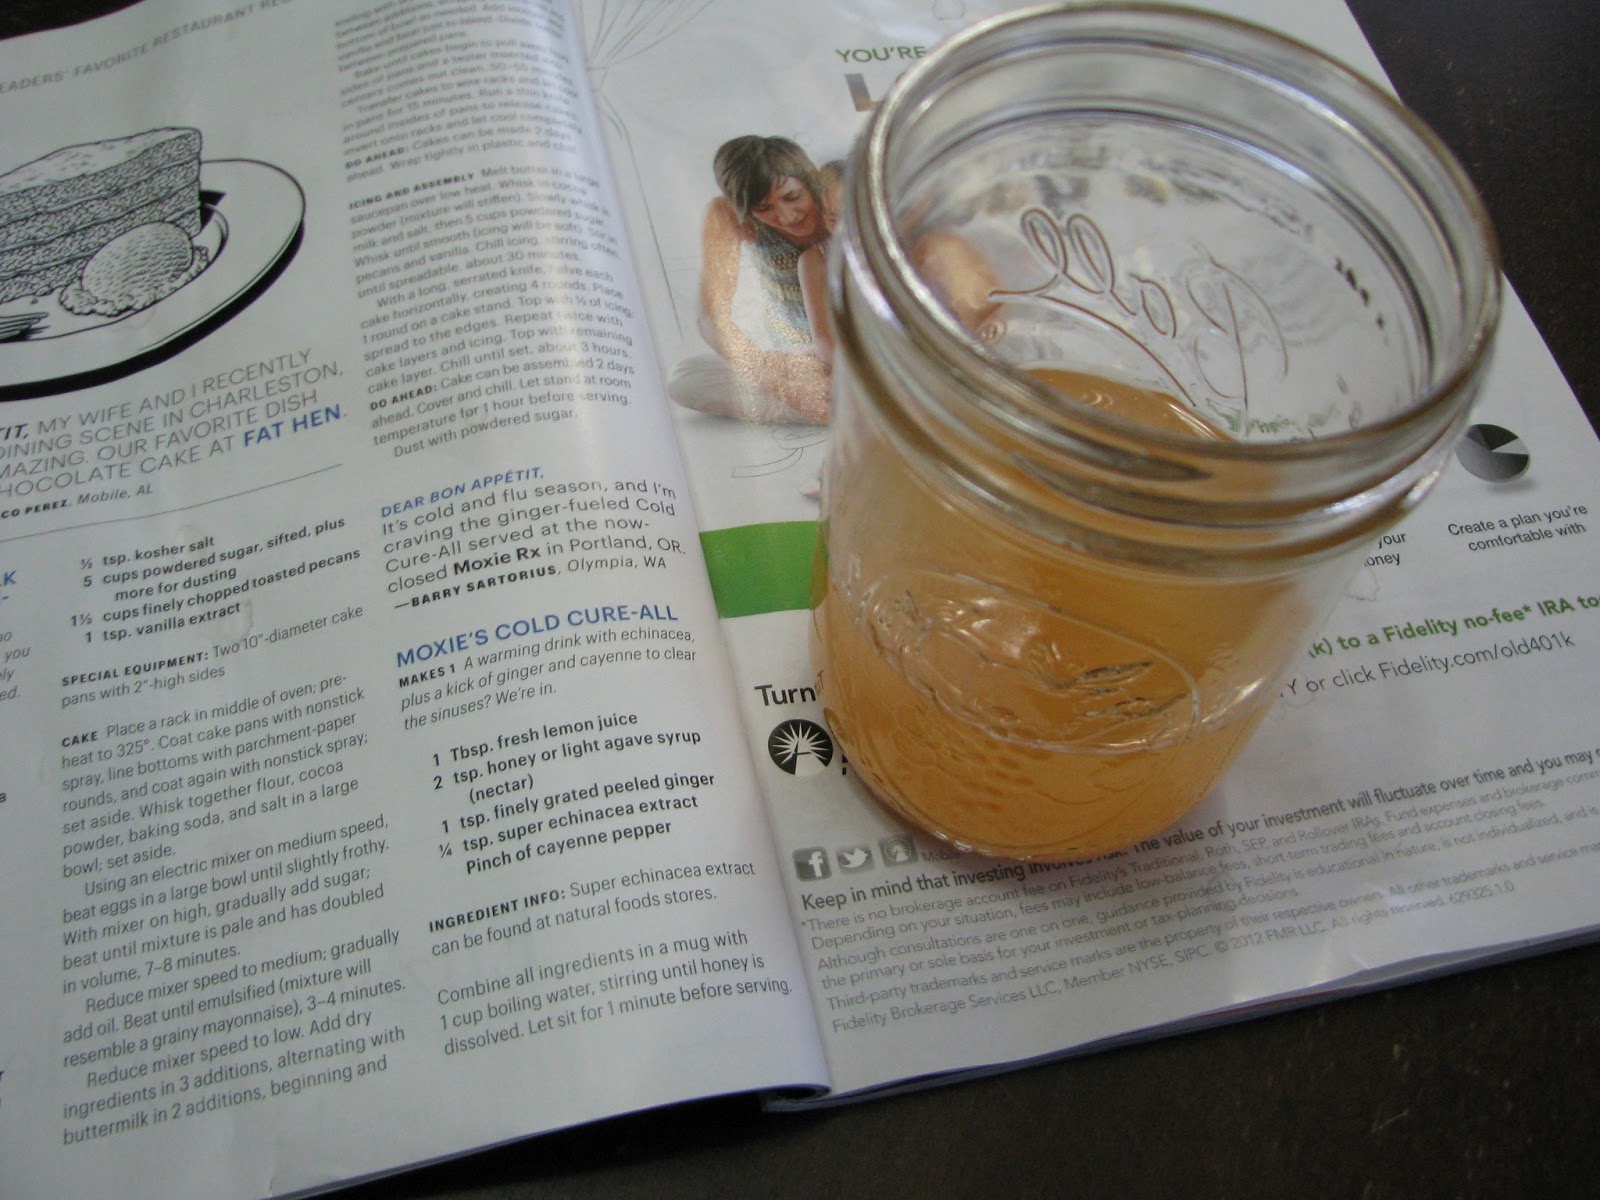
Good Food Friday: Immune Tonic

Well it is that time of year again I think it's safe to say we are all fighting something.  Being sick is no fun and sometimes staying healthy feels like a full time job.  Especially if you are trying to keep a whole house feeling fine.

I stumbled across this drink in one of my magazines and was immediately hooked by the ingredient list alone.  Lemons.  Ginger.  Echinacea.  I'm pretty sure this is the healthy vegan substitute for chicken broth!


Immune Tonic


Ingredients:

  • 1 Tbsp fresh lemon juice
  • 2 tsp. honey or light agave
  • 1 tsp finely grated peeled ginger (in the beginning I used powder)
  • 1/4 tsp echinacea extract (sometimes I skip this, it's still amazing)
  • couple drops of sriracha

Directions:
  • Measure and combine all ingredients into a mug (I double mine into a pint jar)
  • Add 1 cup boiling water stirring until sweetener is dissolved 
  • Let sit one minute before serving
inspired by bon appetit magazine (01/13)

I've been using this to replace my morning tea or afternoon snack.  If you are brave for an extra immune boost you could add some fresh peeled minced garlic.  

Wouldn't this make a great soup base?  Some sauted veggies and a spoonful of rice.  See what you can come up with...


Tuesday, January 8, 2013

Pinspiration and a Happy Handmade Christmas: Little Girl

I love homemade gifts.

I realize lots of people say that.  Let me clarify.

I can't stop smiling while I am making something for someone I love.  I can hardly wait to give it to them.  I nearly cry when they open it.. and I get all warm and fuzzy every time they use what I have made.

The whole process for me is delightful.  Scouring Pinterest for ideas.  Shopping and scavenging for supplies.  Drinking mug after mug of  wine hot tea after the kids are asleep... Spending nights at the table making wonderful things.

The girls presents are always especially fun for me.  Beyond Barbies, I think it is challenging to shop for girls. I want quality and wholesome but often stores have plastic and superficial.  

Oh well.  So I made my own.

Here is what they found Christmas morning...


A simple wooden box (bought with my 50% off coupon) decorated with clearance stickers and my wood burning tool that I bought last year.  And inside...


... a scrap fabric paper doll kit!  What girl could resist?!?!  Color, cut, glue... ribbons and pom poms.  
(inspired by this)

and the little one found this...


not just a mint tin...


but two new friends in a little bed!


They are adorable.  And again, made from simply scraps! 
(inspired by this)

And finally for the girls to share this matching game.


The original was made of paper but I love using felt.  Next time (because I will make this again for some lucky little friend's birthday) I will glue only the middle so my stitches around the edge look better!


These are three success stories.  I attempt homemade gifts every year and most years they look like attempted homemade gifts.  I feel doubly good this year because they actually look as good as the projects that inspired them.  These lovely presents have gotten lots of use already.  Thanks Pinterest!


More homemade Pinterest success stories to come!!!  

*********************************************************

p.s.  I just remembered that I also painted my first shirt... a gold unicorn on pink shirt using a stencil I created myself on the silhouette.  Now if I can just her to not wear it long enough so I can wash it and snap a picture...you will have to take my word for it! But I did find this blurry shot of her unicorn wearing it Christmas morning...


How about you?  Any surprising homemade gift success stories... do tell!!!


Monday, January 7, 2013

DIY: Chalkboard Wall Calendar

It has been a long time coming and seeing this project completed is a dream.


One huge blank wall.

Two hours and two rolls of painters tape.

Three coats of chalkboard paint.


A think it is a great way to start the new year.  Organized.

Here are a few more pictures of the process...

Just took the tape off.


Priming.


Sunday, November 25, 2012

Shutterfly Fan: Helping to Spread the Love

Stationery card
View the entire collection of cards.


It is not a secret. I am a huge fan of Shutterfly. Each year a huge majority of presents to Aunts & Uncles, parents, grandparents, etc. are from Shutterfly. I have a family share site (yes mom I know it needs updating) and Jackie has a family share site (her's needs updating too). I love to order prints, calendars, mugs, magnets, and have been eyeing up the canvas print and the throw blanket. How neat would it be to have a blanket with your favorite photo of all time for each of the kids?

Why am I sharing this? Not a normal blog topic. Yeah. I know. But you know I like taking pictures and so does Jackie. Here is where we get the majority of them printed. I also took the plunge and ordered Christmas cards this year and got 10 FREE. I can't send them to everyone so I thought I would share it here as well. Isn't it lovely?

Special thanks to Jen & Byron for taking the awesome family photos of us. I feel just a little bit trendier now and sometimes that is OK. Why would you like Shutterfly? I think they offer GREAT deals at GREAT prices. Wait for the deals like I do. I won't buy without a very good deal. In in an effort for full disclosure. I get $10 dollars for sharing this with you that will go towards Nana and GiGi's Christmas presents. If you have a blog look into Shutterfly's "help spread the word" program and see if you can't get $10 for sharing your projects on your blog. Best of all it didn't hurt to share how I save money and get great gifts.

Happy shopping. Where ever you shop and for whatever you shop for.


Sunday, November 11, 2012

Adorable Baby Bunnies & Blog Business


These cuties will give you your daily "awwww" quota for sure. These little chunkies are the only litter for the 2012 year. If I am right we have two boys and a girl. While I won't have room for both boys, the black and white little boy will definitely stay. The brown boy will most likely find a home as someone's little pet. The little brown girl will stay and make additional babies for our tiny backyard rabbitry.  

As always I have lots and lots planned for the blog but I lack the time actually do something about it! That doesn't mean though you can't stay in touch. I frequently post to our facebook page updates about what is going on behind the scenes, interesting news, photos, recipes, and things I learn. Please take a moment to "like" our page and keep in touch won't you?

Never a dull moment as Jackie and I discuss and move forward on a creative business and I get ready to apply for a twelve week market garden course to start in January. The 2013 growing season will find me at a local farmers market or two and working my way towards being a full time farmer.

Also, don't forget to follow us on Pinterest (using the links to the left). You never know what creative and beautiful things we will pin there! Thanks for following along. We really appreciate you. 


Friday, October 5, 2012

Corn Free Dairy Free Vegan Caramel

There is something about fall that makes certain foods more appealing. You know what I'm talking about... all things apple and/or caramel.  But you throw in a food allergy like dairy or corn and literally half of the most tempting fall deserts are eliminated.  Caramel is by definition butter, sugar and milk.  When planning my daughter's early fall birthday party this year I was determined to figure this one out: a dairy free and corn (syrup) free caramel for caramel chocolate covered apples.

I started with this basic recipe.  The proportions seemed right and I would only need to attempt one major substitution.  When you are playing with specialty ingredients, it can get expensive so you want to do most of the guessing before you actually start.

Please read through instructions a couple times before attempting.  I promise after you make it once, it will all make perfect sense the next time!

Ingredients:
  • 2 cups organic sugar
  • 2 cups almond milk
  • 1 cup agave 
  • 1 cup earth balance or your normal butter substitute
Equipment required:
  • large pot, at least 6 quart
  • candy thermometer
Instructions:

Place all ingredients in you pot and clip your candy thermometer onto the side.  Warm over low to medium heat.  I hovered around a three or four.  Stir, stir, stir.  The liquid will boil at 212*F and stay at that temperature until the water has evaporated.  Eventually the mixture will begin to rise in temperature again and being to thicken.  Around 230* you will begin to see a significant change, this is about 30 minutes since you started.  The mixture will bubbly continuously.  Keep stirring.  When the mixture reaches 245* the resulting caramel will harden when cooled.  You can test this by spooning some onto a plate and placing it in the freezer for just a minute.  When you take it out it should be very hard, not runny at all.  At this point, you can either pour the hot caramel into a buttered baking pan (8 X 8) and let cool, or you can allow it to cool and thicken slightly in the pot 
and dip clean, dry organic apples into to caramel.


You can see in this picture how my caramel pooled around the base of the apple.  That is just because I am impatient and began dipping my apples in the very hot caramel.  The second tray came out much better!  

After allowing the caramel apples to harden (about 20 minutes) I dipped them again, only halfway this time, in chocolate (corn free and vegan enjoy life chips) mixed with a couple tablespoons of almond milk to thin it.  I then quickly dipped the apples in either chopped almonds (for the adults) or sprinkles (for the kids)!

so festive!

The apples were a huge hit.  It wasn't until later that I realized I served sugar (organic apples) covered in sugar (corn free dairy free caramel) dipped in more sugar (chocolate)!  Wow, maybe next time I'll just make the brownies... but even they are better with caramel! 


(If you want to keep the caramel in a liquid state to use as a sauce for brownies or ice cream or even in a hot fall beverage, heat only to 230*F and keep it in a glass jar with a tight lid and refrigerate.  Yum!)


Related Posts Plugin for WordPress, Blogger...